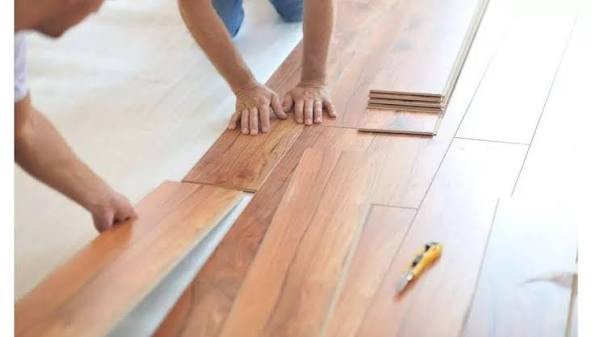
Standing in the flooring aisle staring at stacks of hardwood planks, you wonder if this is a project you can handle yourself, notes best areas to invest in Littleton. Hardwood floor installation requires patience, the right tools, and attention to detail. But with proper planning and a methodical approach, many homeowners can successfully install their own hardwood flooring and save thousands in labor costs.
The key to a successful hardwood floor installation is preparation. Rushing through the early steps leads to problems later. A weekend warrior approach does not work for hardwood. The acclimation process alone takes three to seven days. Plan for the project to take one to three weeks from start to finish for a typical room.
Acclimate the Hardwood Flooring
Hardwood flooring must adjust to the temperature and humidity of the room where it will be installed before you can work with it. This process is called acclimation, and skipping it is the most common cause of installation failure. Hardwood flooring expands and contracts with changes in humidity. If you install hardwood that has not acclimated, the planks will gap or buckle after installation.
Bring the unopened boxes of hardwood flooring into the room where the floor will be installed. Stack them with spacers between the boxes so air can circulate. Leave the boxes for three to seven days depending on the season and the difference between the storage and installation environments. The moisture content of the hardwood should be within 2 percent of the subfloor moisture content before installation begins.
Use a moisture meter to check both the hardwood flooring and the subfloor. The moisture readings should be within 2 percentage points of each other. If the difference is greater, allow more acclimation time. Do not rush this step. Installing hardwood flooring that is too wet or too dry for the room conditions will cause costly problems later.
Prepare the Subfloor
The subfloor must be clean, dry, level, and structurally sound before installing hardwood flooring. Any imperfections in the subfloor will telegraph through the finished floor and ruin the appearance. A smooth, flat subfloor is the foundation of a professional-looking hardwood installation that will last for decades without developing squeaks or soft spots.
Remove existing flooring, tack strips, and staples. Sweep and vacuum the subfloor thoroughly. Check for high spots using a 6-foot level. Sand down high spots or use self-leveling compound on low spots. The subfloor should be flat within 1/8 inch over 6 feet for a smooth hardwood installation.
Install a moisture barrier over concrete subfloors. Concrete releases moisture vapor that can damage hardwood flooring over time. Use a 6-mil polyethylene sheet or a vapor-retardant primer designed for this purpose. For plywood subfloors, install 15-pound roofing felt as a moisture barrier and cushioning layer between the subfloor and the hardwood.
Plan the Layout
Hardwood flooring is typically installed parallel to the longest wall in the room. Planks running the length of the room make it look longer. Planks running across the width make it look wider. Consider the room dimensions when planning the direction of your hardwood flooring installation.
Measure the room width and divide by the plank width to determine the width of the last row. If the last row will be less than 2 inches wide, adjust the first row to create a wider final row. A narrow last row looks unprofessional and is difficult to install. The first and last rows should be approximately the same width for the best appearance.
Snap chalk lines to guide the installation. The first row must be perfectly straight because every subsequent row follows the first. Measure from the starting wall at several points and snap a line parallel to the wall. Leave a 1/2-inch expansion gap between the hardwood and the wall to allow for natural expansion of the wood with seasonal humidity changes.
Install the First Rows
The first row of hardwood sets the stage for the entire installation. Take your time getting it right. Start with the tongue side of the plank facing the wall. Place spacers between the plank and the wall to maintain the expansion gap. The gap will be covered by baseboard or quarter round after the installation is complete.
Face nail the first row through the face of the plank near the wall side. The nails will be covered by baseboard later. Drill pilot holes to prevent splitting the wood, especially near the ends of the planks. Use a finish nailer with 2-inch nails for face nailing. Space the nails 6 to 8 inches apart along the length of each plank.
Blind nail through the tongue at a 45-degree angle using a flooring nailer. The nailer positions the nail correctly and countersinks it below the tongue surface so the next plank fits tightly over it. Continue blind nailing each row as you work across the room. The flooring nailer is essential equipment that can be rented from most tool rental stores.
Continue Installing Rows
As you continue across the room, stagger the end joints between rows by at least 6 inches. Staggering prevents long continuous seams that look unprofessional and are structurally weaker. Random staggering creates a more natural appearance. Avoid creating a repeating pattern where end joints line up every third or fourth row.
Tap each plank into place using a tapping block to protect the tongue from damage. Do not hit the hardwood directly with a hammer. A tapping block distributes the force across the tongue and prevents splitting. Fit each plank snugly against the previous row. Gaps between rows allow dirt and moisture to reach the subfloor.
Cut the last plank in each row to length using a miter saw. Measure the remaining space and subtract the expansion gap for the hardwood flooring. Cut the plank to the correct length and install it. Use the cutoff piece to start the next row if it is at least 12 inches long. This minimizes waste and creates natural-looking staggered joints.
Install the Last Rows
The last rows are the most challenging because of the limited space between the last installed row and the wall. You may need to rip the last row lengthwise to fit. Use a table saw or circular saw with a straightedge guide to cut the planks to the correct width. Account for the 1/2-inch expansion gap when measuring the width.
Use a pry bar and tapping block to pull the last rows tight. Place the pry bar against the wall and gently tap the last row into place. Face nail the last row through the face of the planks near the wall side. The nails will be covered by baseboard or quarter round molding after the installation is complete.
Install quarter round or shoe molding to cover the expansion gap around the perimeter of the room. Paint or stain the molding to match the baseboard or the floor. The molding completes the professional appearance of the installation and protects the expansion gap from debris.
| Step | Time required | Tools needed |
| Acclimation | 3 to 7 days | Moisture meter |
| Subfloor prep | 1 to 2 days | Level, self-leveling compound, vapor barrier |
| Layout planning | 2 to 4 hours | Tape measure, chalk line, calculator |
| Installation | 2 to 5 days per room | Flooring nailer, miter saw, tapping block |
| Finishing | 1 to 2 days | Baseboard, molding, nail set |
DIY vs Professional Installation
DIY hardwood floor installation saves $3 to $8 per square foot in labor costs. For a 300-square-foot room, the savings are $900 to $2,400. However, DIY installation requires a significant time commitment, the right tools, and the patience to do the job correctly. Mistakes are expensive and difficult to fix after the floor is installed.
Tool rental costs add $100 to $300 to the DIY project. You need a flooring nailer, miter saw, tapping block, pry bar, and moisture meter. Some of these tools can be rented. Others must be purchased. Factor the tool costs into your budget before deciding whether to DIY or hire a professional for the installation.
Professional installation costs $3 to $8 per square foot in labor. The contractor brings all necessary tools and has the experience to handle challenges that arise during installation. Professional installers complete the job faster and typically provide a warranty on their workmanship. For complex layouts or expensive hardwood, professional installation is worth the cost.
A flooring contractor with 25 years of experience said: “The most common mistake I see with DIY hardwood installation is not leaving enough expansion gap around the perimeter. Homeowners think the gap looks bad and try to close it up. Three months later when the humidity changes, the floor buckles. That 1/2-inch gap is not optional. It is the most important detail in the entire installation. The baseboard covers it anyway, so nobody will ever see it.”
Frequently Asked Questions
Is hardwood flooring installation difficult for a beginner?
Hardwood installation needs patience and careful planning. Beginners can succeed by taking time on each step and using the right techniques.
What tools do I need to install hardwood flooring?
You need a flooring nailer, saw, tapping block, and pry bar. A flooring nailer can be rented from most tool rental stores.
How long does it take to install hardwood flooring?
Acclimation takes 3 to 7 days. Installation takes 2 to 5 days per room. The total project from start to finish takes 1 to 3 weeks for a typical room and installation.
Why does hardwood need an expansion gap?
Wood expands and contracts with humidity changes. The 1/2-inch gap around the perimeter allows the floor to move without buckling. Baseboard covers the gap after installation.
How long should hardwood acclimate before installation?
Hardwood needs 3 to 7 days to acclimate in the room. The moisture content must be within 2 percent of the subfloor before installation begins.
What type of subfloor is needed for hardwood?
Hardwood can be installed over plywood or concrete. The subfloor must be flat, dry, and clean. Concrete requires a moisture barrier before the installation begins.
How much money can I save installing hardwood myself?
DIY saves $3 to $8 per square foot in labor. A 300-square-foot room saves $900 to $2,400. Tool rental costs $100 to $300. The savings must cover your time and effort for the project.
Should I choose engineered or solid hardwood for DIY?
Engineered hardwood is more stable and easier for DIY. Solid hardwood requires nailing and is better suited for experienced professionals.
