You have chosen your paint color and bought all the supplies, notes Keyrenter South Florida solutions. But before you open that paint can, there is one more step that separates a professional-looking paint job from a disappointing one. Wall preparation. The wall paint preparation time you spend determining how well the paint adheres and how smooth the final finish looks. Wall paint preparation takes one to two days for a typical room, and skipping any step leads to visible imperfections in the finished paint job.
Proper wall preparation involves six main steps: cleaning the walls, patching holes and cracks, sanding surfaces, priming, taping trim, and protecting floors and furniture. Each step serves a specific purpose and contributes to a paint finish that looks professional and lasts for years without peeling, cracking, or showing through marks.
Step 1: Clean the Walls
The first step in wall preparation is cleaning the surfaces thoroughly. Walls accumulate dust, dirt, grease, and residue over time. Paint will not adhere properly to dirty walls. The new paint may look fine at first but will start peeling within months if applied over dirt or grease. Cleaning removes these contaminants and ensures the paint bonds to the wall surface as intended.
Start by dusting the walls from top to bottom using a dry microfiber cloth or a vacuum with a soft brush attachment. This removes loose dust and cobwebs. Then wash the walls with a mild detergent solution or trisodium phosphate (TSP) substitute. Mix the cleaner according to the manufacturer instructions and apply with a sponge or cloth. Pay special attention to areas around light switches, door frames, and corners where dirt and grease accumulate.
Rinse the walls with clean water after cleaning. Any cleaner residue left on the walls prevents proper paint adhesion. Change the rinse water frequently as it becomes dirty. Allow the walls to dry completely for 24 hours before moving to the next step. Drying time is essential because painting over damp walls causes the paint to bubble and peel as the moisture tries to escape through the fresh paint layer.
Step 2: Patch Holes and Cracks
Inspect the walls for nail holes, cracks, dents, and damaged areas. Small nail holes and hairline cracks are filled with spackling compound applied with a putty knife. Apply the spackle in a thin layer, slightly overfilling the hole. Allow it to dry according to the product instructions, usually one to two hours for small repairs.
Larger holes and damaged areas require more extensive repair. Holes up to 1/2 inch can be filled with spackle in multiple layers. Holes larger than 1/2 inch need a patch. Use a self-adhesive mesh patch over the hole and cover it with joint compound. Apply the compound in thin layers, allowing each layer to dry before applying the next. Sand between layers for a smooth finish that matches the surrounding wall.
Cracks in drywall seams may require re-taping. If the existing tape has lifted or the crack is along a seam, remove the loose tape, apply new joint compound, embed fresh drywall tape, and cover with a thin layer of compound. Allow to dry and sand smooth. Seam repairs take longer because each layer of compound must dry completely before the next application.
Step 3: Sand the Walls
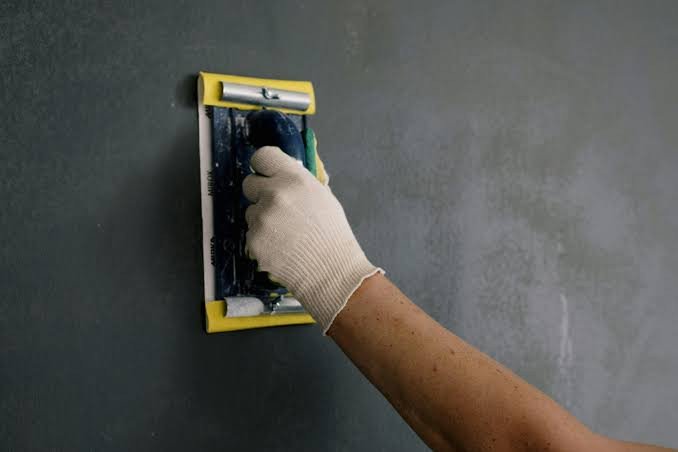
Sanding creates a smooth surface for the paint to adhere to. Use a sanding block or pole sander with medium-grit sandpaper (120 to 150 grit) for the initial sanding. Sand the patched areas until they are smooth and flush with the surrounding wall. Then do a light sanding of the entire wall surface to remove any remaining bumps or texture from the existing paint.
After sanding, wipe the walls with a tack cloth or damp rag to remove all sanding dust. Sanding dust left on the walls creates a gritty texture in the new paint. Vacuum the floors and wipe down all surfaces before proceeding to the next step. The walls must be completely clean and dust-free for the primer to bond properly to the prepared surface.
For glossy or semi-gloss existing paint, sanding is especially important. Glossy surfaces do not provide enough texture for new paint to grip. Sanding dulls the gloss and creates a rough surface for better adhesion. If the existing paint is very glossy, use a finer grit sandpaper (150 to 180) to scuff the surface without creating visible scratches that show through the new paint coat.
Step 4: Prime the Walls
Primer is essential for a professional paint job. It seals the wall surface, provides a uniform base for the paint, and helps the paint adhere properly. Primer also prevents stains from bleeding through the new paint and hides the old color so fewer coats of paint are needed. Skipping primer is a false economy that leads to poor coverage and a shorter-lasting paint job.
Use a high-quality primer appropriate for your wall type and the paint you will be using. Water-based primer works for most interior walls. Oil-based primer is recommended for covering stains, wood surfaces, and previously unpainted walls. Apply primer with a roller for large areas and a brush for edges and corners. Allow the primer to dry completely according to the manufacturer instructions before painting.
Primer also helps hide the old color when making a dramatic color change. Going from dark to light or from light to dark requires primer to prevent the old color from showing through. A tinted primer in a shade close to your final paint color provides the best coverage and may reduce the number of paint coats needed for full coverage of the new color.
| Step | Time needed | Materials | Purpose |
| 1. Clean | 1 to 2 hours | TSP cleaner, sponge, water | Remove dirt and grease |
| 2. Patch | 1 to 3 hours plus drying | Spackle, putty knife, mesh patch | Fill holes and cracks |
| 3. Sand | 1 to 2 hours | Sanding block, sandpaper, tack cloth | Smooth surfaces for adhesion |
| 4. Prime | 1 to 2 hours plus drying | Primer, roller, brush | Seal wall, improve adhesion |
| 5. Tape | 30 to 60 minutes | Painter tape, drop cloths | Protect trim and edges |
Step 5: Tape Trim and Protect
Apply painter tape to protect trim, baseboards, window frames, and door frames from paint drips and roller marks. Use high-quality painter tape designed for clean removal. Press the tape down firmly along the edge to prevent paint from seeping underneath. Apply drop cloths to protect floors and furniture from paint splatter during the painting process.
Cover outlets and switches with tape or remove the covers. Removing covers allows you to paint behind them for a clean edge around the switch plates. Label each cover with its location for easy reinstallation. Place drop cloths over all furniture that cannot be removed from the room. Cover the entire floor with drop cloths or plastic sheeting to protect against drips and spills.
The preparation steps take one to two days for a typical room. The time investment pays off in the quality of the finished paint job. A properly prepared wall requires fewer coats of paint, has a smoother finish, and the paint lasts longer without peeling or showing imperfections. Skipping preparation steps to save time leads to disappointing results that may require repainting sooner.
A painting contractor with 25 years of experience said: “The most common mistake I see homeowners make is skipping the cleaning step. They patch holes and sand, but they do not wash the walls first. Grease and dirt invisible to the naked eye prevent the paint from bonding. Within a year, the paint starts peeling in the kitchen and bathrooms where grease and humidity are present. Cleaning is the most important step, and it costs nothing but time.”
Frequently Asked Questions
What is the most important wall preparation step?
Cleaning the walls is the most important step. Paint will not adhere properly to dirty or greasy walls. Thorough cleaning prevents peeling and ensures the paint bonds to the surface correctly.
Can I skip primer when painting walls?
Primer is not optional for best results. It seals the wall, hides the old color, and helps paint adhere. Skipping primer leads to poor coverage and a shorter-lasting paint finish.
How long should walls dry after cleaning before painting?
Walls should dry for 24 hours after cleaning. Drying time varies by temperature and humidity. Use a moisture meter or touch test to confirm the wall is dry.
Do I need to sand glossy walls before painting?
Yes, glossy walls need sanding to dull the surface. Use fine-grit sandpaper to scuff the gloss. Without sanding, new paint may peel from the surface.
How do I patch a large hole in drywall?
Holes larger than 1/2 inch need a mesh patch. Apply the patch over the hole, cover with joint compound in thin layers, let dry, and sand smooth between each layer for best results.
What cleaner is best for prepping walls?
TSP substitute is the best cleaner for prepping walls. It removes grease and dirt without damaging the paint. For kitchen walls, use a degreaser to remove cooking residue before painting.
How do I cover stains before painting?
Use stain-blocking primer for water or smoke stains. Oil-based primer works best for stubborn stains. Water-based blockers also work for most wall stains.
How long does wall preparation take?
Wall preparation takes one to two days for a typical room. Cleaning takes 1 to 2 hours. Patching and drying takes 2 to 5 hours. Sanding and priming takes 2 to 4 hours including drying time.
