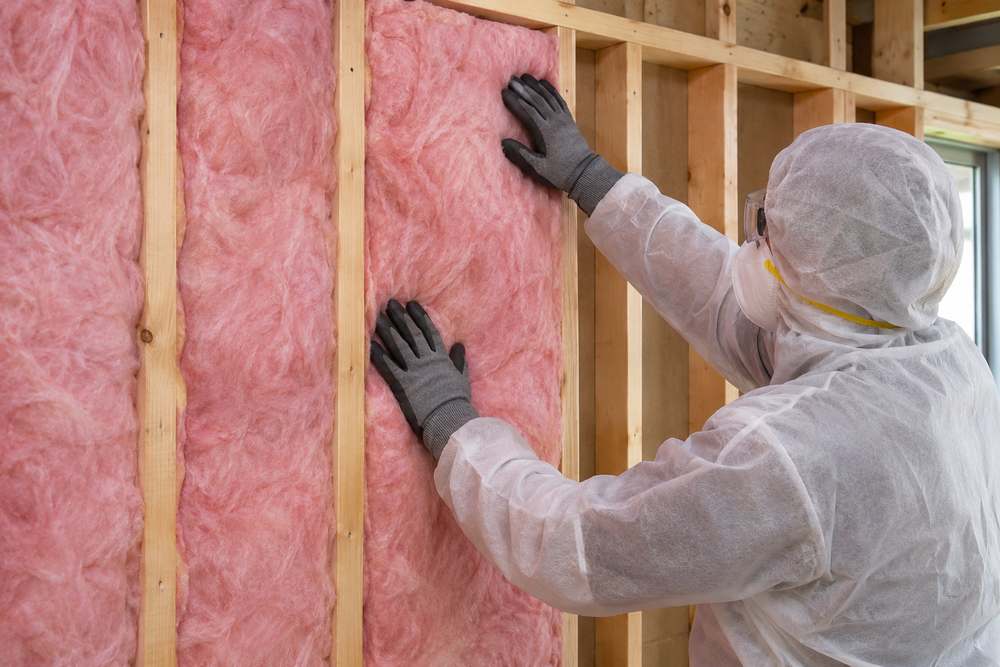
How to install fiberglass insulation comes down to measuring the stud space, cutting the batt slightly oversized, and pressing it in so it friction-fits with no gaps, working protected and clear of recessed fixtures and heat sources. The two details that decide whether a DIY job works are a void-free fit and an airtight vapor plan, not the brand of batt.
The install routine below mirrors how a good crew runs a fiberglass job, with the safety stops and tools before you start, a checkpoint at each phase, and the mistakes that quietly cut performance. If you are deciding whether fiberglass is the right material for your home first, the fiberglass insulation pros and cons guide walks through that trade-off.
What you need before you start
You need the right batt depth for the cavity, a utility knife with sharp blades, a tape measure, a straightedge, a putty knife, and the protective gear that makes the job safe.
An N95-rated mask, safety glasses, gloves, and a long-sleeve shirt are the minimum, and you should gather all of it before the first cut.
Select batts sized to the cavity depth and to standard 16-inch or 24-inch on-center studs.
Unfaced batts are easier to cut and fit than kraft-faced ones when a separate vapor plan is in place, and you should confirm the R-value target for your climate zone with your local code or inspector.
| Step | Key action | Checkpoint | Sign it is wrong |
|---|---|---|---|
| Measure | Measure height/width inside each cavity | Batt matches depth and 16/24-in spacing | Cavity out of square, batt off-size |
| Protect and prep | PPE on, clear hot fixtures and plan cables | Mask, gloves, glasses, long sleeve on | Irritated skin or eyes during work |
| Cut and fit | Cut slightly oversized, press in snug | No gaps at framing, no voids or compression | Gap or void at the cavity edge |
| Handle services | Split batt around cables, insulate behind pipes | Services accessible, insulation continuous | Batt crushed over a wire or pipe |
| Vapor barrier | Staple 4-mil poly on the warm side | Seams lapped, warm-side orientation right | Condensation or a cold/wet interior |
Step one: measure the cavity and pick the batt
Measure the height and width inside each stud cavity at a few points, because framing is rarely perfectly square.
Then match the batt to the depth and the 16-inch or 24-inch on-center spacing. Most batts are sold precut to standard wall heights, so you may only need to trim length, but measure anyway because a single off-size cavity throws off the fit. Leave about a half-inch of extra length for a snug fit, since slightly oversized batts hold better than undersized ones that gap.
Step two: protect yourself and prep the space
Put on an N95-rated dust mask and protective gear before touching the fiberglass, because the fibers irritate the throat, skin, and eyes, and make the space safe to work by keeping the batt clear of recessed lighting and other heat- or flame-generating fixtures. The manufacturer’s install guidance for fiberglass batts recommends this protective equipment outright.
Check the wall or ceiling for outlets, switches, and cables so you plan how to cut around them rather than crushing the batt. On an outside wall with plumbing, decide where the pipe runs so you insulate behind it but leave the side facing the interior exposed to keep the pipe warm.
Step three: cut and friction-fit each batt
Cut the batt to the measured size and press it into the cavity so it stays on its own, snug against the studs on every side, with no gaps at the framing and no compression at the back.
The fit is the whole point, because even small gaps can cut the efficiency of the wall by about a quarter.
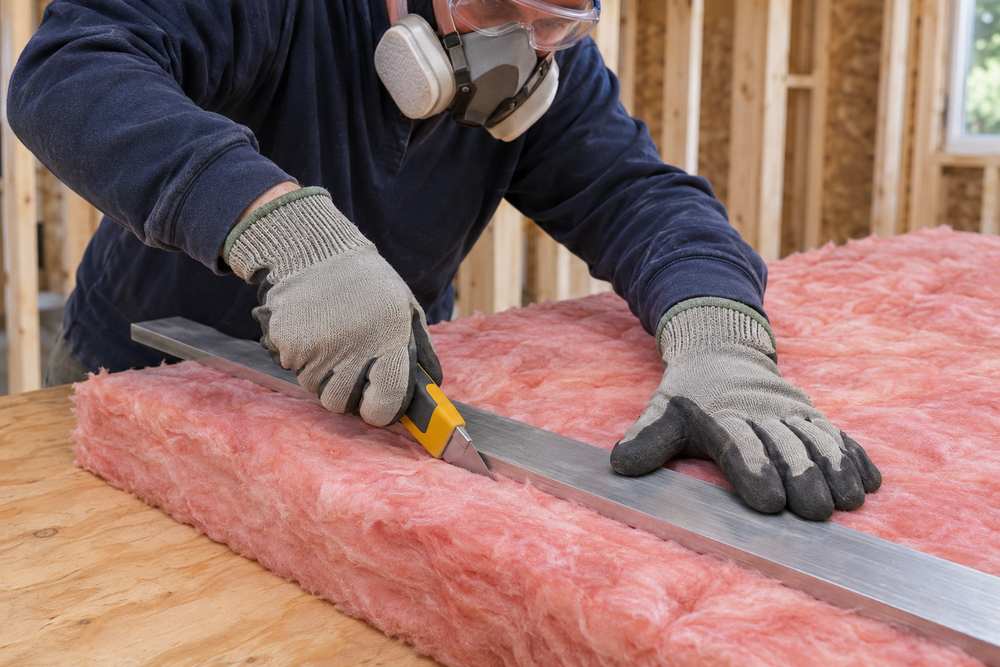
Advance the utility knife along a straightedge with a fresh blade so the cut is clean rather than ragged. When the batt does not reach a tight fit at an edge, trim it to the actual opening rather than stuffing or folding it, since a folded or bunched batt leaves a void and defeats the R-value.
Step four: handle cables, pipes, and openings
Route batts around electrical cables and plumbing instead of crushing them, splitting the batt to fit behind a cable and laying the other half over the top, and keeping exterior-wall pipes warm. This keeps the insulation continuous and the services accessible.
For a cable running down a stud, tear the batt lengthwise, tuck half behind the wire, and lay the second half over it so no gap forms at the wire. Around a window or door, use the putty knife to push insulation into the narrow spaces so the frame cavity is filled without gaps.
Step five: add the vapor barrier and finish
Over unfaced batts in most climates, staple a 4-mil polyethylene vapor barrier across the warm side of the wall to keep interior moisture out of the insulation, and confirm the recommended practice for your area with your building inspector before you close the wall.
Lap the vapor barrier seams by a few inches and staple every 8 to 12 inches so it lies flat, then check the full cavity once more for voids before installing drywall. The vapor side faces the warm interior in heating climates, so confirm the orientation for your zone before you staple.
Common installation mistakes and how to spot them
The most common mistakes, a gapped or compressed batt, a folded edge, insulation packed around a hot fixture, and a missing or backward vapor barrier, each show up as a draft, a cold spot, or a moisture problem months later.
Check each of these before the wall is closed.
- A gap at the framing lets air bypass the insulation and cuts the efficiency of that cavity.
- A bunched or compressed batt leaves a void and lowers the R-value of the section.
- Insulation touching a hot fixture is a clearance hazard, so keep batts away from recessed lighting.
- A missing vapor barrier lets interior moisture reach the cavity and condense.
- A backward vapor barrier traps moisture instead of shedding it, so get the warm-side orientation right.
None of these are fatal if caught before drywall, so a slow walk of the cavity with a flashlight is the cheapest insurance against a cold room or a damp wall later.
DIY versus professional fiberglass installation
Do-it-yourself makes sense for a straightforward, accessible wall or attic cavity where you can work protected and reach the whole opening, while an attic with tight corners, a crawl space, or a large area favors a professional for speed and a uniform result. Weigh the saved labor against the fit and the PPE work.
A clean, reachable cavity on a ground floor is the honest DIY boundary, since a batt install is within reach of most homeowners with the right mask and tools. Attics, high cavities, or large whole-home projects favor a pro who carries the equipment and the volume pricing, and whose warranty can cover the work.
Questions people ask about installing fiberglass insulation
Do you need a vapor barrier over fiberglass insulation?
In most climates over unfaced batts, yes, a 4-mil polyethylene vapor barrier is stapled across the warm side to keep interior moisture out of the cavity. Check your local building practice, because the side that faces warm can vary by zone.
Which way should fiberglass insulation face?
Kraft-faced batts face the warm interior side of the wall, and an unfaced batt gets the vapor barrier stapled across that same warm side. Get the warm-side orientation right in your climate to avoid trapping moisture.
Do you need a mask when installing fiberglass insulation?
Yes, wear an N95-rated dust mask plus safety glasses, gloves, and a long-sleeve shirt, because the fibers irritate the throat, skin, and eyes during installation. The Knauf manufacturer’s install guidance for fiberglass batts recommends this protective equipment.
What is the correct way to install fiberglass insulation?
Measure the cavity, cut the batt slightly oversized, and press it in so it friction-fits with no gaps, no compression, and clear of hot fixtures, then add the correct vapor barrier. The manufacturer’s PPE and the fiberglass batt install guide from Knauf lay out the safe sequence.
The fit that matters most when you install fiberglass insulation
Fit the batt to the cavity and follow the vapor plan, because a fiberglass wall only earns its R-value if the air does not move through a gap.
Every step before the fit is preparation, and every step after is verification.
If you install it, walk the cavity with a flashlight for voids before drywall; if you hire it, ask how they handle the air seal and the vapor barrier on the same scope. A wall that is measured, fitted without gaps, and vapor-barriered correctly will stay comfortable and quiet for years, which is the whole point of the job.
