High ceilings often create a sense of spaciousness, but they can also lead to uneven temperature distribution. Hot air rises, accumulating near the ceiling, while the lower parts of the room remain cooler. Helios Property Management specialists note that a ceiling fan helps to destratify the air, pushing warm air down in winter and creating a cooling breeze in summer, thereby improving energy efficiency and comfort.
Why Install a Ceiling Fan on a High Ceiling?
High ceilings often create a sense of spaciousness, but they can also lead to uneven temperature distribution. Hot air rises, accumulating near the ceiling, while the lower parts of the room remain cooler. A ceiling fan helps to destratify the air, pushing warm air down in winter and creating a cooling breeze in summer, thereby improving energy efficiency and comfort.
Benefits of High Ceiling Fan Installation
- Improved Air Circulation: Distributes air evenly throughout the room.
- Energy Efficiency: Reduces heating and cooling costs by optimizing air movement.
- Enhanced Comfort: Creates a more comfortable living or working environment.
- Aesthetic Appeal: Adds a stylish focal point to a large room.
Essential Tools and Safety Measures
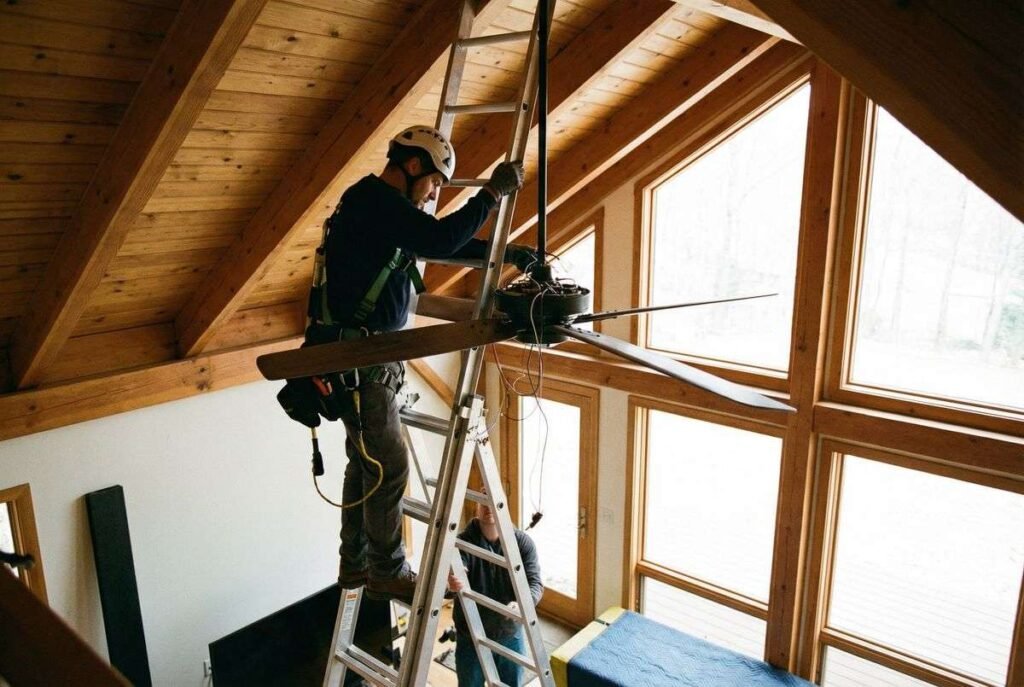
Before you begin the installation of a ceiling fan on a high ceiling, gathering the right tools and prioritizing safety are paramount. Working at elevated heights requires specialized equipment and careful planning to prevent accidents.
Required Tools and Materials
| Tool/Material | Purpose |
|---|---|
| Extension Ladder or Scaffolding | Safe access to the ceiling |
| Voltage Tester | To confirm power is off |
| Drill | For mounting brackets and screws |
| Screwdrivers (Phillips and Flathead) | General assembly |
| Wire Strippers/Cutters | For electrical connections |
| Adjustable Wrench | Tightening nuts and bolts |
| Ceiling Fan Brace/Box (if needed) | Secure mounting point |
| Safety Glasses and Gloves | Personal protection |
Crucial Safety Tips
Always turn off power at the circuit breaker before starting any electrical work. Use a voltage tester to confirm the power is off. Ensure your ladder or scaffolding is stable and properly secured. Consider having a helper to assist with lifting heavy components and to ensure safety.
Step-by-Step Installation Process
The installation process for a ceiling fan on a high ceiling involves several key stages, from preparing the mounting location to wiring and final assembly. Each step requires precision and adherence to safety guidelines.
1. Prepare the Mounting Location
Identify the exact spot where the fan will be installed. For high ceilings, this often means ensuring there’s adequate structural support. If an existing electrical box is not rated for ceiling fan weight, or if there’s no box at all, you’ll need to install a fan-rated electrical box and brace. This is a critical step to ensure the fan is securely anchored.
2. Assemble the Downrod and Mounting Bracket
Most high ceiling fan installations require a longer downrod to bring the fan to an optimal height (typically 8-9 feet from the floor). Attach the downrod to the fan motor assembly according to the manufacturer’s instructions. Then, secure the mounting bracket to the fan-rated electrical box on the ceiling.

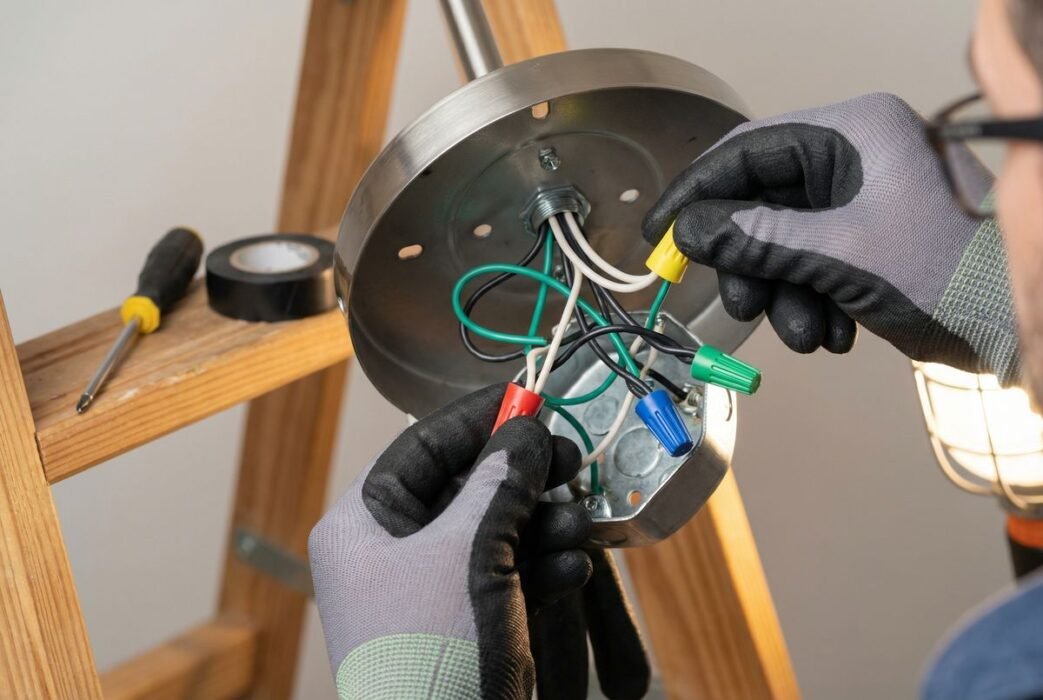
3. Wire the Ceiling Fan
This is where electrical knowledge is essential. Connect the fan’s wires to the house wiring, typically matching black to black (hot), white to white (neutral), and green or bare copper to green (ground). Use wire nuts to secure connections and ensure they are tight. Double-check all connections before proceeding.
4. Mount the Fan Motor and Blades
Carefully lift the fan motor assembly and hang it from the mounting bracket. This can be challenging with a long downrod and a high ceiling, so a helper is highly recommended. Once the motor is securely in place, attach the fan blades, ensuring they are balanced according to the manufacturer’s instructions to prevent wobbling.
5. Install Light Kit and Test
If your ceiling fan includes a light kit, install it now, following the specific instructions provided. Once all components are assembled, restore power at the circuit breaker and test the fan’s operation, including all speed settings and the light (if applicable). Listen for any unusual noises or wobbling.
Common Challenges and Solutions
Installing a ceiling fan on a high ceiling can present unique hurdles. Being aware of these and knowing how to address them can save time and frustration.
Challenge: Insufficient Wiring
Sometimes, older homes may not have the necessary wiring for a separate fan and light control. Solution: Consider installing a remote control kit, which allows independent operation of the fan and light from a single power source. Alternatively, consult an electrician to run new wiring.
Challenge: Wobbling Fan
A wobbling fan is not only annoying but can also be a safety hazard. Solution: Ensure all blade screws are tight and that the blades are balanced. Many fans come with a balancing kit. Also, check that the mounting bracket is securely fastened to a fan-rated electrical box.
Myth Busting: High Ceilings and Fan Effectiveness
A common misconception is that ceiling fans are ineffective in rooms with very high ceilings because the air movement won’t reach the living space. This is a myth. With the correct downrod length, a ceiling fan can effectively circulate air even in exceptionally tall rooms. The key is to position the fan blades approximately 8-9 feet from the floor, allowing them to create a comfortable airflow zone.
Conclusion
Successfully installing a ceiling fan on a high ceiling is a rewarding home improvement project that enhances comfort and energy efficiency. By carefully planning, using the right tools, prioritizing safety, and following these detailed steps, you can achieve a professional installation. Remember, if you encounter any difficulties or are unsure about electrical connections, it is always best to consult a qualified electrician to ensure a safe and effective installation of your ceiling fan.
Frequently Asked Questions
What is the ideal downrod length for a high ceiling?
The ideal downrod length positions the fan blades approximately 8-9 feet from the floor for optimal air circulation.
Do I need a special electrical box for a ceiling fan?
Yes, you need a fan-rated electrical box and brace, which are designed to support the weight and movement of a ceiling fan. Standard electrical boxes are often not sufficient.
Can I install a ceiling fan on a sloped high ceiling?
Yes, but you will likely need an angled mounting kit or adapter, which allows the fan to hang straight down from a sloped ceiling.
How do I balance a wobbling ceiling fan?
First, ensure all blade screws are tight. If wobbling persists, use a fan balancing kit, which typically includes weights and clips to identify and correct imbalances.
Is it safe to install a ceiling fan by myself on a high ceiling?
While possible, it is recommended to have a helper due to the height and weight of the fan. If you are uncomfortable with electrical work or working at heights, consider hiring a professional.
