White grout, a hallmark of clean and pristine bathrooms, can quickly lose its luster, often succumbing to an unsightly yellow discoloration. This common issue not only detracts from the aesthetic appeal of tiles but also signals underlying problems that, if left unaddressed, can lead to more significant maintenance challenges. Understanding the root causes of this yellowing is the first step toward effective prevention and restoration. Factors ranging from everyday bathroom habits to environmental conditions contribute to this phenomenon, making a comprehensive approach essential for maintaining the bright, clean appearance of your grout lines. This article will delve into the primary culprits behind yellowing grout, explore proactive prevention strategies, detail effective cleaning solutions, and discuss the importance of sealing to ensure your white grout remains brilliant for years to come.
Understanding the Causes of Yellow Grout
White grout’s pristine appearance is often short-lived in high-moisture environments like bathrooms. Several factors contribute to its gradual yellowing, transforming a once-bright surface into a dull, discolored one. One of the most prevalent causes is the accumulation of soap scum and body oils. Every shower or bath leaves behind residues from soaps, shampoos, conditioners, and natural body oils. These substances, especially when combined with hard water minerals, create a sticky film that adheres to porous grout lines. Over time, this film oxidizes and traps dirt, leading to a noticeable yellow or brownish tint. This issue is particularly pronounced in areas with frequent water exposure, such as shower walls and bathtub surrounds, where the constant wetting and drying cycles exacerbate residue buildup.
Another significant contributor to yellowing grout is hard water. Water with a high mineral content, particularly calcium and magnesium, leaves behind deposits when it evaporates. These mineral deposits, often appearing as white or off-white stains on surfaces, can react with soap scum and other residues, creating a yellowish hue on grout. The porosity of grout makes it an ideal surface for these minerals to accumulate and bond, making them difficult to remove with regular cleaning. Furthermore, the presence of iron in hard water can directly stain grout a yellowish-orange color. Addressing hard water issues, perhaps through a water softener, can be a long-term solution to mitigate this specific cause of discoloration.
Mold and mildew growth also play a crucial role in the discoloration of white grout. Bathrooms provide an ideal breeding ground for these fungi due to their warm, humid conditions and abundant moisture. While mold and mildew often appear black, green, or pink, their initial stages or certain species can manifest as yellowish stains. These organisms thrive on organic matter found in soap scum and body oils, embedding themselves within the porous structure of the grout. Beyond aesthetics, mold and mildew pose health risks, making their prevention and removal a priority. Regular ventilation and prompt drying of surfaces are critical in inhibiting their growth and preserving grout color.
Proactive Prevention Strategies
Preventing white grout from yellowing is far more effective and less labor-intensive than attempting to restore its original color after discoloration has set in. Implementing a few simple, consistent habits can significantly extend the life and appearance of your grout. One of the most crucial steps is regular cleaning with appropriate products. Daily or weekly cleaning with a pH-neutral cleaner designed for grout and tile can prevent the buildup of soap scum, body oils, and hard water deposits. Harsh, acidic, or alkaline cleaners should be avoided as they can degrade grout sealants and even damage the grout itself, making it more susceptible to staining. A soft-bristled brush or an old toothbrush can be used to gently scrub grout lines, ensuring that residues are lifted before they have a chance to set.
Ensuring proper ventilation is another cornerstone of grout preservation. High humidity levels create an ideal environment for mold and mildew, which are significant contributors to yellowing. Running an exhaust fan during and after showers for at least 20-30 minutes can dramatically reduce moisture in the air. If an exhaust fan is not present, opening a window or door can provide adequate air circulation. Additionally, wiping down shower walls and grout lines with a squeegee or towel after each use helps to remove excess moisture and prevent water from sitting on the grout, thereby minimizing the opportunity for mineral deposits and microbial growth.
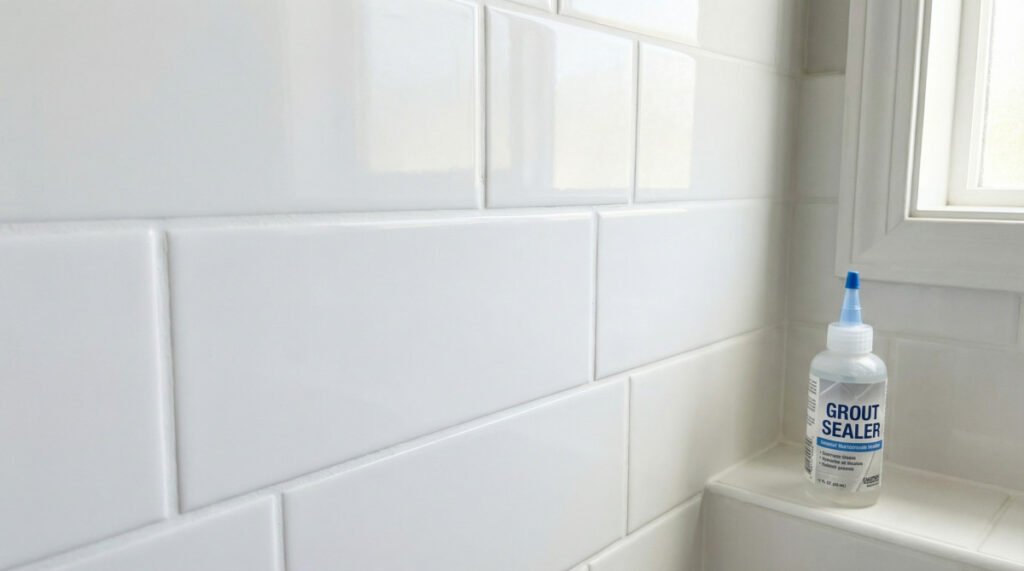
Finally, sealing the grout is a critical preventative measure that is often overlooked. Grout is inherently porous, meaning it has tiny microscopic holes that can absorb liquids, dirt, and contaminants. A high-quality grout sealer creates a protective barrier on the surface, preventing these substances from penetrating the grout lines. Sealers typically need to be reapplied every 1-3 years, depending on the product and the amount of traffic and moisture the area receives. A sealed grout line is not only more resistant to yellowing but also easier to clean, as dirt and grime sit on the surface rather than embedding themselves within the grout. This simple step can save countless hours of scrubbing and significantly prolong the pristine appearance of your white grout.
Effective Cleaning Solutions for Yellowed Grout
When prevention alone isn’t enough, and white grout has already begun to yellow, a range of cleaning solutions can help restore its original brightness. The choice of cleaning method often depends on the severity of the discoloration and the type of stain. For light yellowing caused by soap scum and general grime, a mild alkaline cleaner or a paste made from baking soda and water can be highly effective. Baking soda, a natural abrasive and deodorizer, can be applied to grout lines, allowed to sit for 10-15 minutes, and then scrubbed with a brush before rinsing. For more stubborn stains, a mixture of baking soda and hydrogen peroxide can provide a more potent cleaning action. Hydrogen peroxide is a mild bleaching agent that can help lift stains without damaging the grout.
For more significant yellowing, particularly that caused by mold, mildew, or deep-seated stains, stronger solutions may be necessary. Oxygen bleach, such as products containing sodium percarbonate, is an excellent option. Unlike chlorine bleach, oxygen bleach is generally safer for colored grout and less harsh on the environment, yet highly effective at breaking down organic stains. It works by releasing oxygen when mixed with water, which helps to lift and remove discoloration. Apply a paste or solution of oxygen bleach to the grout, let it dwell for several hours or even overnight, and then scrub and rinse thoroughly. Always test any strong cleaning solution in an inconspicuous area first to ensure it doesn’t cause discoloration or damage to your specific grout or tile.
In cases of extreme yellowing or when other methods have failed, professional-grade grout cleaners containing phosphoric acid or sulfamic acid may be considered. These acidic cleaners are highly effective at dissolving hard water deposits, rust stains, and efflorescence, which can contribute to yellowing. However, they must be used with extreme caution, as they can etch natural stone tiles and degrade cementitious grout if not used properly. Always follow manufacturer instructions precisely, wear appropriate personal protective equipment (gloves, eye protection), and ensure adequate ventilation. For most homeowners, starting with milder solutions and gradually increasing strength is the safest and most recommended approach to avoid damaging grout or surrounding surfaces.
The Role of Grout Sealing in Long-Term Protection
Grout sealing is not merely a preventative measure; it is a fundamental component of a long-term maintenance strategy for preserving the pristine appearance of white grout. As previously mentioned, grout is a porous material, akin to a sponge, readily absorbing liquids and contaminants. Without a protective barrier, every spill, every shower, and every cleaning agent can penetrate the grout, leading to discoloration, staining, and even structural degradation over time. A high-quality sealer fills these microscopic pores, creating an invisible shield that repels water, oils, and dirt. This barrier significantly reduces the likelihood of yellowing by preventing the absorption of soap scum, hard water minerals, and organic matter that fuels mold and mildew growth. The initial investment in sealing and periodic reapplication pays dividends by drastically cutting down on cleaning effort and extending the lifespan of your grout.
There are primarily two types of grout sealers: penetrating sealers and topical sealers. Penetrating sealers, also known as impregnating sealers, are the most recommended type for cementitious grout. They soak into the grout, forming a barrier within the pores while allowing the grout to breathe. This type of sealer does not change the appearance of the grout and is highly durable, often lasting 3-5 years or even longer in low-traffic areas. Topical sealers, on the other hand, form a protective film on the surface of the grout. While they offer excellent stain protection, they can alter the grout’s appearance (often giving it a glossy finish), can be prone to peeling or cracking, and may require more frequent reapplication. For white grout, a penetrating sealer is generally preferred as it maintains the natural look and breathability of the grout while offering superior long-term protection against yellowing.
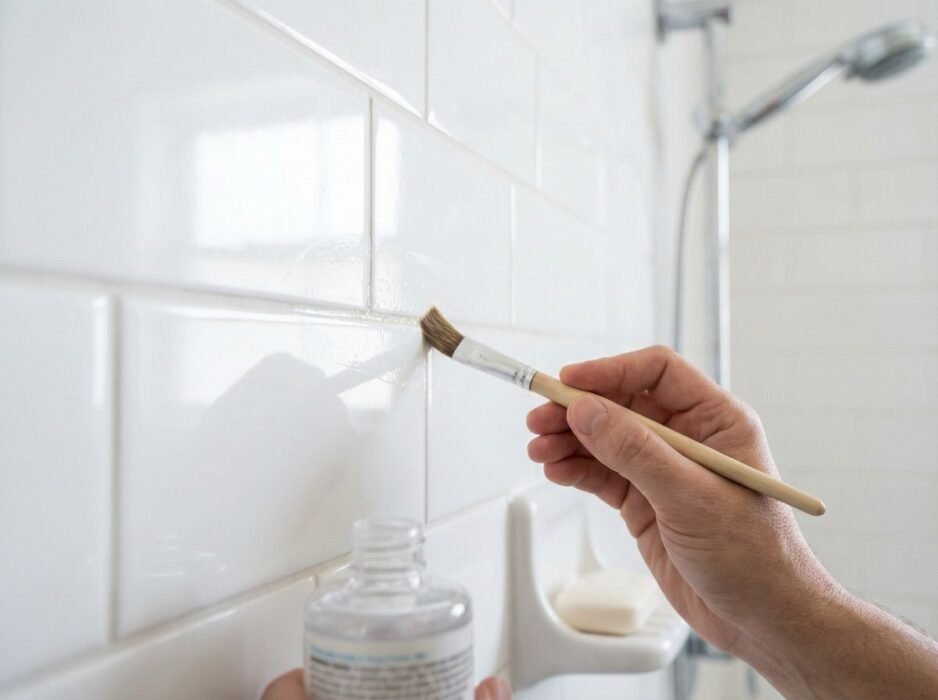
Applying grout sealer is a straightforward process that can be done by most homeowners. After thoroughly cleaning the grout and ensuring it is completely dry (typically 24-48 hours after cleaning), the sealer is applied directly to the grout lines using a small brush, roller, or applicator bottle. Excess sealer should be wiped off the tiles immediately to prevent hazing. Depending on the product, multiple coats may be required, with adequate drying time between applications. A simple water bead test can determine if the sealer is working effectively: if water beads up on the grout surface, the seal is intact; if it soaks in, it’s time to reapply. Regular reapplication, typically every 1-3 years depending on product specifications and bathroom usage, is crucial for continuous protection against yellowing and staining.
Verdict: Best Practices for Maintaining White Grout
Maintaining the pristine white appearance of grout requires a multi-faceted approach that combines diligent prevention with effective cleaning and consistent protection. The verdict is clear: proactive measures are paramount. Relying solely on reactive cleaning after discoloration has occurred is a losing battle, often leading to frustration and the need for more aggressive, potentially damaging, cleaning agents. The most effective strategy involves a combination of daily habits and periodic maintenance tasks that collectively create an environment hostile to yellowing.
Firstly, daily post-shower maintenance is non-negotiable. A quick wipe-down of shower walls and grout lines with a squeegee or towel, coupled with running an exhaust fan for 20-30 minutes, significantly reduces moisture and the accumulation of soap scum and hard water deposits. This simple routine, taking mere minutes, prevents the vast majority of yellowing causes from taking hold. Secondly, weekly cleaning with a pH-neutral cleaner specifically designed for grout will address any minor buildup before it becomes a problem. This gentle yet effective cleaning prevents the oxidation of residues and inhibits microbial growth without compromising the grout’s integrity or sealant.
Finally, the regular application of a high-quality penetrating grout sealer is the ultimate long-term defense. Think of it as an invisible armor for your grout. While it requires reapplication every few years, the protection it offers against absorption of stains, dirt, and moisture is invaluable. A sealed grout line is not only resistant to yellowing but also dramatically easier to clean, as contaminants remain on the surface. By integrating these three practices—daily moisture control, weekly gentle cleaning, and periodic sealing—homeowners can confidently maintain their white grout, ensuring it remains bright, clean, and a beautiful complement to their bathroom tiles for many years to come. This holistic approach minimizes the need for harsh chemicals and intensive scrubbing, preserving both the aesthetic and structural integrity of your grout.
Frequently Asked Questions About White Grout Maintenance
| Cleaning Method | Primary Target | Effectiveness | Safety for Grout | Typical Cost |
|---|---|---|---|---|
| Baking Soda Paste | Light soap scum, general grime | Moderate | High | $1-$5 |
| Baking Soda & Hydrogen Peroxide | Moderate stains, mild discoloration | Good | High | $5-$10 |
| Oxygen Bleach (Sodium Percarbonate) | Mold, mildew, deep organic stains | Very Good | High (safer than chlorine) | $10-$20 |
| pH-Neutral Grout Cleaner | Daily maintenance, light buildup | Good | High | $8-$15 |
| Acidic Grout Cleaners (Phosphoric/Sulfamic) | Hard water, rust, efflorescence, severe yellowing | Excellent | Low (use with extreme caution) | $15-$30 |
| Professional Grout Cleaning | Severe discoloration, ingrained dirt | Excellent | High (when done by pros) | $100-$500+ |
Why does white grout turn yellow even after cleaning?
Even after cleaning, white grout can appear yellow due to several persistent issues. One common reason is the incomplete removal of hard water mineral deposits, which can leave a yellowish film that is difficult to see when wet but becomes apparent as it dries. Another factor is the degradation of the grout sealant, allowing microscopic particles of soap scum, body oils, and dirt to penetrate deep into the porous structure, leading to embedded stains that surface even after superficial cleaning. Additionally, if harsh cleaning agents were used, they might have stripped the original sealant, making the grout more susceptible to future discoloration. In some cases, the yellowing might be due to oxidation of residues that have been deeply absorbed into the grout over time, requiring more specialized cleaning methods to extract.
Can bleach be used to whiten yellowed grout?
While chlorine bleach is a powerful whitener, its use on grout, especially white grout, is often discouraged and can be counterproductive in the long run. Chlorine bleach can degrade the cementitious binders in grout, making it more porous and susceptible to future staining and yellowing. It can also strip away existing sealants, leaving the grout unprotected. Furthermore, bleach can react with certain types of mold or mildew, causing them to change color rather than disappear, or even spread. A safer and often more effective alternative for whitening yellowed grout is oxygen bleach (sodium percarbonate), which works by releasing oxygen to lift stains without the harsh corrosive effects of chlorine bleach. Always test any bleach product in an inconspicuous area first.
How often should grout be sealed to prevent yellowing?
The frequency of grout sealing depends on several factors, including the type of sealer used, the amount of traffic and moisture the area receives, and the quality of the grout itself. Generally, penetrating grout sealers, which are highly recommended for white grout, should be reapplied every 1 to 3 years. In high-traffic areas like shower floors or frequently used bathroom floors, reapplication might be needed annually. For less exposed areas, such as shower walls or backsplashes, every 3-5 years might suffice. A simple test to determine if resealing is necessary is to drop a few beads of water onto the grout. If the water beads up on the surface, the sealer is still effective. If the water soaks into the grout, it’s time to reapply the sealer to maintain its protective barrier against yellowing and staining.
Are there natural remedies to clean yellow grout?
Yes, several natural remedies can be effective for cleaning lightly yellowed grout, particularly those stains caused by soap scum and general grime. A popular and effective solution is a paste made from baking soda and water. Apply the paste to the grout lines, let it sit for 10-15 minutes, then scrub with a stiff brush and rinse thoroughly. For a more potent natural cleaner, mix baking soda with hydrogen peroxide to form a paste. Hydrogen peroxide has mild bleaching properties that can help lift stains. Another option is to use white vinegar, but it should be used with caution as its acidity can degrade cementitious grout over time and strip sealants. If using vinegar, dilute it with water (1:1 ratio) and ensure good ventilation. Always rinse thoroughly after using any acidic cleaner. For best results, combine these natural remedies with consistent preventative measures.
What is the best way to clean heavily yellowed grout without damaging it?
Cleaning heavily yellowed grout without causing damage requires a careful, stepped approach. Start with the least aggressive method and gradually increase strength if needed. Begin with a paste of oxygen bleach (sodium percarbonate) and water. Apply it to the grout, let it dwell for several hours or even overnight, then scrub with a stiff brush and rinse. This is generally effective for organic stains and safer than chlorine bleach. If stains persist, consider a professional-grade grout cleaner containing phosphoric or sulfamic acid, but use these with extreme caution. Always follow manufacturer instructions, wear protective gear, and test in an inconspicuous area. These acidic cleaners are excellent for hard water deposits and rust but can etch natural stone and degrade grout if misused. For very severe cases, or if you are unsure, consulting a professional grout and tile cleaner is advisable to avoid irreversible damage.
Maintaining the pristine appearance of white grout in bathrooms is an ongoing endeavor that demands a combination of diligent prevention, timely cleaning, and consistent protection. The battle against yellowing grout is best won through proactive strategies rather than reactive interventions. Understanding the common culprits—soap scum, hard water, mold, and oxidation—empowers homeowners to implement targeted measures. Regular cleaning with pH-neutral products, ensuring adequate ventilation, and, most critically, the consistent application of a high-quality penetrating grout sealer form the bedrock of effective grout maintenance. While various cleaning solutions exist for already yellowed grout, from baking soda pastes to oxygen bleach, the ultimate goal is to minimize the need for such intensive treatments. By embracing a holistic approach that prioritizes prevention and protection, homeowners can preserve the bright, clean aesthetic of their white grout, ensuring their bathrooms remain a testament to cleanliness and care for years to come. This commitment not only enhances the visual appeal of the space but also contributes to a healthier and more hygienic environment.
