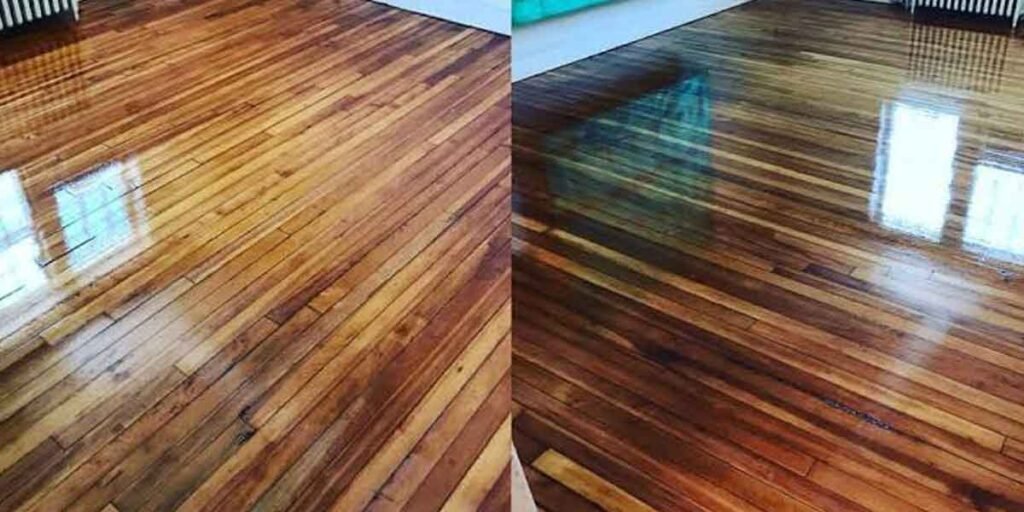
Floor refinishing is a measured sequence, not a technique. You sand the old coating away, take a thin pass of wood with it, and rebuild the finish over several days. Almost every failure traces back to a reading nobody took or a window nobody watched.
Treat it as a series of gates, each with a number or a test attached. Moisture content before sanding. Wear layer before the first cut. Grit order inside the cut. Recoat timing between coats. Adhesion once the last coat has cured. A floor can pass every visual inspection and still fail the gate that decides whether the finish survives.
Two Readings and One Test Before Any Sanding
Three conditions have to be settled before do-it-yourself floor refinishing starts: whether the wood is dry enough for the space, whether a previous owner waxed it, and whether the coating about to be sanded off contains lead.
Moisture comes first because it is the only one of the three you can fix by waiting. The National Wood Flooring Association puts the tolerance at a 2 percent difference between the flooring and the wood subfloor for plank 3 inches and wider, and 4 percent for strip flooring under 3 inches wide. Flooring itself generally sits between 6 and 9 percent moisture content, with a wood subfloor under 12 percent. Those figures come from installation guidelines, and they are the numbers to test before floor refinishing begins, because a floor that cups and gaps with the seasons will do it again under a new finish.
Sampling matters as much as the meter. NWFA practice calls for at least 40 flooring readings and 20 subfloor readings per 1,000 square feet, not one reading beside the door. Pin meters read deepest and most reliably, while pinless meters scan fast and need species calibration to mean anything.
Room conditions belong in the same pass, because finish makers publish coverage and dry times at roughly 60 to 80 degrees Fahrenheit and 30 to 50 percent relative humidity. A cold house or a wet week stretches every timing window below by half again.
The wax test belongs before the sander, not after
Paste wax and acrylic polish cause more coating failures than any abrasive choice, and they hide in plain sight because a waxed floor simply looks dull rather than damaged.
Two field tests settle it. Swab a low-traffic spot on the main floor clean, let it dry, then leave a drop of mineral spirits there for about three minutes and wipe with a white rag: yellow or brown transfer, or a waxy feel, means paste wax. For acrylic polish, leave a drop of ammonia mixed with water and dish detergent for five to ten minutes, and a milky white spot confirms it.
Run either test where people actually walk, not in a closet or under a rug. Maintenance products get used on the open floor, and the protected corners read clean either way.
Skipping this test carries the worst downside in the whole sequence. General Finishes, which supplies finishes to a large share of professional refinishers, states the problem flatly: once you wax, you cannot go back. Wax penetrates grain, the friction of sanding heats it and drives it deeper, and removal has to happen before any abrasive touches the wood. Silicone contamination is worse, because it is nearly impossible to remove and often invisible until the first coat pulls away from it.
The Wear Layer Sets the Ceiling on Floor Refinishing
How many times a floor can be sanded comes down to the thickness of the wood sitting above the core, and that thickness is printed on the manufacturer’s spec sheet.
Solid 3/4 inch hardwood tolerates several cuts across a long life. Engineered boards tolerate one or two, and some tolerate none at all.
The NWFA’s Engineered Wood Flooring Refinishable Program sets minimum wear layers of 3.2 mm for unfinished products and 2.5 mm for factory-finished ones, measured at the lowest point rather than the average on sculpted and distressed surfaces. The NWFA Sand & Finish Guidelines use 3/32 inch, close to 2.4 mm, as the field minimum. A standard sanding pass removes roughly 0.75 to 1 mm of wood, which sounds abstract until you run it against a real number.
Run it against a 2 mm veneer and the answer turns uncomfortable. One cut can take half of what is there, a second reaches the core, and once the core is exposed the floor cannot be refinished again. Distressed and wire-brushed engineered boards carry the most risk, because the published thickness is an average and the valleys sit below it.
There is a way to check before a whole room is committed. Pull a floor register or a transition strip and look at the plank edge, or measure the cross-section with calipers. A test patch in a closet takes twenty minutes and shows whether the machine cuts through to core.
Screen and recoat when the wood cannot afford another cut
Screen and recoat abrades the existing finish and adds a topcoat without removing wood. It handles dullness, light surface scratches, and a finish worn thin in traffic lanes, while deep scratches, gray weathered wood, stain sitting in the grain, and any color change stay out of reach. On a thin veneer it is the only floor refinishing available; on a healthy floor it buys a few years before the full sand.
The conditions are the same as a full sand, with one addition: enough intact film left to bond to. Where a traffic lane has worn through to bare wood, new coating goes over a surface that is already failing, and that patch lets go first.
Machines and Grit Order
The machines used for floor refinishing each have one job, and the grit order is what turns a rough cut into a surface that takes stain evenly.
A drum or belt sander flattens and removes the bulk of the old finish. A large random-orbit or hard-plate orbital sander follows it to erase the drum’s scratch pattern. An edger reaches the perimeter the big machine cannot, and a buffer fitted with screens carries the between-coat abrasion. Dust control rides on every one of them: a shroud plus HEPA extraction at the point where dust is generated, not a box fan in the doorway.
| Cut | Typical abrasive | What has to be true before the next step |
|---|---|---|
| Initial cut | 36 or 40 grit on a drum or belt sander | Old finish gone, high spots flattened, no chatter marks from a pass taken too fast |
| Second cut | 50 or 60 grit | Drum scratches from the initial cut gone across the whole field |
| Final cut | 80 or 100 grit | Uniform scratch pattern, no cross-grain scratches left by the edger |
| Pre-finish screening | 100 or 120 grit screen | Perimeter blended into the field, dust removed with a vacuum and a tack cloth |
| Between coats | 120 to 180 grit screen, or 220 grit paper | Grain raise knocked flat without cutting into the wood |
The sequences come from abrasive and finish manufacturers rather than folklore, and they agree on the shape of the work. Norton’s floor sanding chart runs 36 or 40 through 50 or 60 to 80 or 100 for a refinish, then screens at 100 or 120 before finish. Bona publishes its own paths for the same job, including a 50-60-100-120 route. What every version shares is one prohibition: never skip more than a single grit at a time.
Skipping is a delayed defect instead of a shortcut. A 36 grit cut leaves valleys that a 100 grit screen cannot flatten. The floor looks acceptable until stain goes down, and then every valley takes color differently under a raking light.
Match the edger grit to the drum grit at each stage. Cut the perimeter one step finer or coarser than the field and the two areas reflect light differently, a halo around the edge of the room that refinishers call picture framing.
Renting a drum sander for the first time is where the order matters most: flatten, refine, screen, coat. The floor refinishing process explained walkthrough covers that sequence stage by stage on solid wood, including the timing between cuts.
What Each Pass Has to Pass
Every stage of floor refinishing has a condition that has to be true before the next one starts, and most of them are visible without instruments.
After the final cut, walk the room with a bright lamp held low and rake the beam across the surface. Drum chatter, pigtails, and cross-grain scratches stay invisible under ceiling light and show up at an angle. A dark line following the grain around the perimeter is an edger scratch, and it comes out before stain goes on, not after.
Dust is the second gate. Vacuum after every grit change, then vacuum again and wipe with a tack cloth before the first coat. A palm wiped across the surface tells you where you stand: if it comes up dull with dust, the finish will bond to that dust and the first coat will dry grainy.
Temperature and humidity get read again here. A floor that measured dry on Monday morning and is being coated in a cold room on Thursday night will cure badly no matter what the label promises.
Coats, Windows, and the Adhesion Test
The coating stage of floor refinishing is a set of deadlines. A coat applied inside the recoat window bonds chemically to the layer beneath it, and a coat applied after that window closes needs abrasion so the new film can grip mechanically.
Waterborne finishes run fast. Bona’s Traffic HD, a two-part waterborne, lists a recoat window of 2 to 3 hours. Oil-modified polyurethane is slower: DuraSeal’s technical data sheet calls for at least eight hours of dry time and an abrasion with a 120 grit screen or a maroon pad before the next coat.
Some products in both families publish an upper limit instead of a lower one. Minwax’s Ultra Fast-Drying Polyurethane for Floors, for instance, instructs users to recoat between two and twenty-four hours and to sand with 220 grit once that window passes.
Two milestones follow the final coat: when the floor can be walked on, and when it can be covered. Walking is quick, with light traffic the next day for most waterborne products and furniture back in about two days.
Rugs are the milestone people get wrong.
Coverings block air from a film still curing underneath, and a rubber-backed mat laid on a soft finish can bond to it. Waterborne coatings generally want a few days to about two weeks; oil-modified finishes are commonly held to thirty days. Manufacturer language decides the question. Bona tells users of its fastest two-part product to wait at least three days before carpets or other floor coverings, and a label that says thirty days means thirty days.
Test the bond instead of trusting a calendar
NWFA practice after a finish cures is a cross-hatch adhesion test per ASTM D3359. Wait at least 24 hours, cut a grid or an X through the coating to the substrate, press tape over the cuts, and pull it off quickly. Coating that lifts with the tape is the failure signal, and the common field threshold holds that more than 5 percent removal means the film comes off and the wood goes back to bare.
The same test works on a hidden patch before a recoat is committed to an entire room, which is the cheapest insurance available on a floor with an unknown history.
When the Next Floor Refinishing Project Is Due
No manufacturer publishes a calendar interval for floor refinishing, because a finish wears at whatever rate the household imposes on it. Condition decides, and three signals mark the line.
Screen and recoat when the surface reads dull in traffic lanes but the wood is not exposed. Sand back to bare wood when finish has worn through in a lane, the surface has gone gray where light hits it, or scratches are deep enough to catch a fingernail. Entry halls, kitchens, and the strip in front of a sliding door wear first, and those are the places to look.
Maintenance between floor refinishing projects is unglamorous: felt pads under furniture, water wiped up instead of left to sit, and cleaners without wax or silicone in them. A floor that never gets coated with polish keeps the option open for whoever lives there next.
Where Homeowner Work Stops
Three conditions put floor refinishing beyond what a homeowner should attempt with rented equipment: a floor that is too thin, a coating that may contain lead, or a finish history unknown enough that nothing new will hold.
Lead carries a regulation. The EPA’s Renovation, Repair and Painting rule, 40 CFR 745.85, governs paid work in pre-1978 housing and child-occupied facilities, and it triggers on interior work that disturbs more than 6 square feet of painted surface per room. That regulation allows machines which remove paint by high-speed operation, a floor sander among them, only with a shroud or containment system and a HEPA vacuum attachment collecting dust where it is generated. Wet methods, plastic containment, and a certified respirator belong to the same standard.
Homeowners working on their own house sit outside that requirement, and the dust behaves the same way for them. EPA guidance for do-it-yourself work is to assume lead paint in pre-1978 housing, keep children and pregnant people out of the work area, wear an N-100 respirator, avoid dry sanding and dry scraping, mist surfaces before scraping, vacuum with a HEPA machine rather than a shop vacuum, and clean again afterwards. The exemption also ends for anyone who rents out the property, runs a child care business in it, or buys and renovates homes for resale.
Thin wear layers and contamination bring their own stop signs. A veneer under about 2.5 mm, cupping that returns every summer, a floor treated with an unknown wax product, a failing patch where water reached the subfloor: those are jobs for a flooring contractor. A machine rented on a Saturday is not a reason to learn on a floor you cannot replace.
Frequently Asked Questions
How much does floor refinishing cost?
Professional floor refinishing commonly runs about $3 to $8 per square foot. The spread comes from square footage, how many cuts are needed, whether stain is involved, and whether the finish is waterborne or oil-modified. Jobs needing board replacement, repairs, or heavy removal sit at the top of that range.
Can I refinish my floors myself?
Homeowners can take on floor refinishing themselves when the wear layer is thick, the wood is dry, and no wax or silicone is present. Taking too much off in one pass with a rented drum sander is the expensive mistake, and engineered floors with under about 2.5 mm of veneer should not be sanded at all.
Is it cheaper to refinish or replace floors?
Refinishing costs less than replacement whenever the existing wood takes another cut, because removal, disposal, and new material drop off the bill. Replacement wins when the wear layer is gone, the boards are structurally failing, or the floor is a thin veneer that cannot be sanded.
Can I stay in the house while floors are refinished?
Staying is possible with planning, since dust and solvent fumes peak during sanding and in the first hours after each coat. Most households move to one level or leave during the coating stage and come back when the finish has set enough for light traffic.
