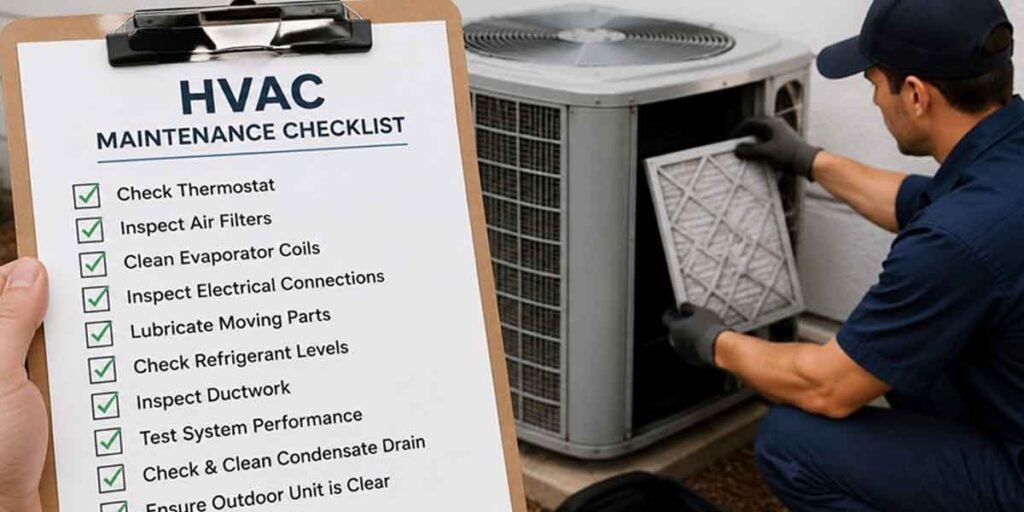
A useful HVAC Maintenance checklist is a set of readings, not a list of chores. Every item on it answers one question: is the system showing you something you can act on this afternoon, or something that needs a technician’s meter?
That question decides who does the work. A filter, an outdoor coil, and a plugged drain pan sit within reach of anyone holding a flashlight and twenty minutes. Gas pressure, refrigerant charge, and motor current do not.
The order below follows the same logic. Cheap checks come first, because a blocked filter and a failing compressor produce identical symptoms: weak cooling, short run times, and a bill that creeps upward.
Run the Checklist in This Order
Work from the outdoor unit to the filter, then to the indoor unit, and finish by running the system through a full cycle with the panels back on. Doing it in that sequence keeps you from diagnosing a compressor when the real problem is a matted coil.
You need less equipment than the length of the list suggests.
- A flashlight that reaches the filter slot
- A vacuum with a brush attachment
- The filter size printed on the old filter’s frame
- A garden hose for the outdoor coil
- The invoice from your last service visit, which says how far into the schedule you are
Outdoor Unit First
Clear vegetation back to the manufacturer’s recommended clearance, which Trane puts at two feet on all sides and four feet above the unit. Clippings, pollen, and twigs collect on the fins and stop the coil from shedding heat.
Look at the fins themselves, not just the ground around them. If a male dog has been marking the unit, the aluminum fins and copper tubing corrode, and corroded tubing is where refrigerant leaks begin. Rinse the coil with the hose on a gentle setting. A pressure washer bends the fins flat and turns a cleaning job into a repair.
Where snow accumulates, clear it off the top and sides of a heat pump, and keep drifts away from the PVC intake and exhaust pipes on a condensing furnace.
Then the Filter
Pull the filter and hold it up to a window. If light does not come through the pleats, it is spent, whatever the calendar says. Trane’s cadence allows 90 days for a home without pets, 30 to 60 days with pets, and 30 days for a one-inch filter in a household with allergies. Treat those numbers as ceilings and check the filter before each one arrives.
Write the replacement date on the new filter’s frame with a marker. A date you can read at the slot beats a reminder you have to remember.
I skipped that step for most of a first summer. The filter looked gray but not black, so I slid it back in and read the climbing bill as a hot season instead of a restricted return. Two weeks after a swap, the house held its set temperature again.
Inside and Around the Indoor Unit
Empty the space around the furnace or air handler and keep combustible material away from a gas furnace. Then check the drain pan and the condensate line, where a plug first shows up as moisture under the unit and higher indoor humidity.
Walk the supply and return registers last. Furniture, drapes, and rugs that block them restrict airflow at a point the system cannot compensate for.
What Each Check Tells You
The same three symptoms, weak cooling, short cycles, and higher bills, can come from a filter, a coil, or a refrigerant charge. ENERGY STAR links airflow problems to as much as 15 percent of lost cooling efficiency, and that number explains the overlap: two of those three causes are mechanical and yours, and the third is not.
| What you see or hear | What it points to | Who handles it |
|---|---|---|
| No light through the filter pleats | Restricted return air, so the blower works harder and cooling drops | You, that day |
| Coil matted with clippings or lint | The coil cannot shed heat, with efficiency losses near the 15 percent ENERGY STAR figure | You, with a gentle hose rinse |
| Corrosion or bent fins on the outdoor unit | Copper tubing is thinning where refrigerant leaks start | A technician |
| Moisture under the indoor unit | A plugged condensate drain, with humidity problems and damage to the floor below | You first, a technician if it returns |
| Banging or scraping at startup | A mechanical fault with no visible cause | A technician |
| A burning smell at startup | An electrical fault that gets worse with every cycle | Shut the system off, then a technician |
| Bills climbing while usage stays flat | One or more components running below spec | A technician |
Noise and odor only exist while the system runs, which is why the cycle test comes at the end of the list. Listen and sniff during the first start after each seasonal change, when the contrast with a quiet house is easiest to catch.
The first four rows are maintenance, and each one has a cause you can see. The last three are diagnosis, and diagnosis needs instruments: a manifold gauge set, a multimeter, a combustion analyzer. Careful looking does not substitute for a measured reading, and it is not supposed to.
When the Checklist Should Fire
Schedule two professional visits a year, cooling in spring and heating in fall, and hang them on the daylight saving time changes so the dates stay fixed in memory. ENERGY STAR recommends exactly that pairing, for a practical reason: contractors fill their calendars the moment the first heat wave or cold snap lands.
The filter check runs monthly through both seasons. Everything else carries a season with it. Coil condition and clearance belong in late spring, before the cooling load builds. The drain line, the registers, and the carbon monoxide detector batteries belong in fall, before the furnace starts working.
If a whole-house humidifier or dehumidifier is part of the system, put those on the same visit. One appointment covering both beats two trips with the same travel time attached.
What a Service Visit Should Include
A maintenance visit worth paying for contains measurements rather than observations, so ask what the technician will test before you book, then read the numbers on the invoice afterward.
ENERGY STAR’s checklist for a check-up names the items. Thermostat settings get verified. Electrical connections get tightened with voltage and current measured on the motors. Moving parts get lubricated. The condensate drain gets inspected. The start and stop cycle gets confirmed. Cooling work adds evaporator and condenser coil cleaning, a refrigerant level check, and blower adjustment. Heating work adds gas or oil connections, gas pressure, burner combustion, and the heat exchanger.
That division is where hvac maintenance best practices start: the owner keeps the accessible parts clean, and the technician owns anything that needs a meter or a flame. A visit that changes a filter and skips the measurements has not done the second half.
Price tracks which visit you bought. Trane puts a seasonal technician visit at roughly $100 to $350 depending on the market and what the visit covers, and flags pricing under $70 as a sign that little is included. A filter swap and a glance at the outdoor unit land at the bottom of that range. Coil cleaning, a voltage reading, and documentation land at the top.
Where the Same Checklist Changes
The list above assumes you own both the house and the equipment. Three situations break that assumption, and each one moves a job to a different person.
Renters should confirm before swapping a filter, because the duty often falls to the property owner or manager, and an unapproved part can turn into a lease dispute. Small commercial spaces run equipment far longer and through more dust than a house does, which shortens every interval here, and rooftop units on commercial property are maintained under ventilation and indoor air quality standards such as ASHRAE 62.1 on a documented schedule. Buildings that size get logged readings, not a resident’s monthly glance.
The hard stop is identical in all three settings. Gas connections, refrigerant circuits, electrical panels, and heat exchangers go to qualified technicians in a house, a rental, and a storefront alike. ENERGY STAR notes that a gas connection done wrong is a fire hazard and a cracked heat exchanger is unsafe to run, and Trane advises shutting the system off immediately if you smell electrical burning. No item on the owner’s half of this list asks you to open a gas valve or a sealed refrigerant circuit.
HVAC Maintenance Checklist: Common Questions
What maintenance is needed for an HVAC system?
An HVAC system needs monthly filter checks, seasonal coil and drain inspections, and two professional visits a year. The professional visit covers thermostat settings, electrical connections with voltage and current readings, lubrication, the condensate drain, the start and stop cycle, coil cleaning, refrigerant level, and on the heating side gas pressure, burner combustion, and the heat exchanger.
What is included in HVAC preventive maintenance?
Preventive maintenance includes every owner-inspectable item plus every technician-measured one. Filters, coil clearance, and drain pans fall to the owner. Voltage and current on motors, refrigerant charge, gas pressure, burner combustion, and heat exchanger condition fall to the technician, and those are the items that catch a failure before a season starts.
What are the typical procedures for HVAC servicing?
A service call follows a fixed order: confirm the thermostat is calling, measure voltage and current at the motors, check the electrical connections, lubricate moving parts, clear and test the condensate drain, clean the coils, verify refrigerant level on the cooling side, then check gas pressure, combustion, and the heat exchanger on the heating side. Each step should leave a reading on the invoice.
How often should HVAC maintenance be scheduled?
Professional maintenance runs twice a year, cooling in spring and heating in fall, with the daylight saving time changes as the reminder. Check the filter monthly in between, and treat 90 days as the longest a filter should last in a home without pets, dropping to 30 to 60 days in a household with pets or allergies.
