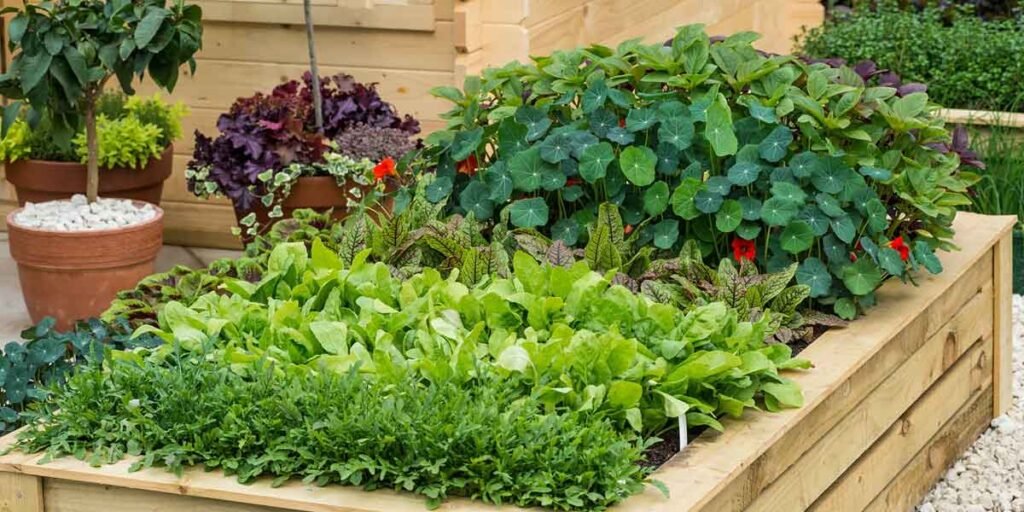
Low maintenance garden design starts with an hour count. Two borders can look identical in a photograph and differ by a factor of five in the hours they take, and the gap is set before the first shrub goes in: bed size, mulch depth, plant spacing, and whether water arrives by hose or by valve.
So the method runs backwards from the usual shopping order. Decide how many hours a week the garden gets in July, then buy the materials and plants that fit inside that number. Skip that step and the garden collects the hours anyway, in the season when weeding and watering both land on the same weekend.
The order that holds up: measurements first, materials second, installation third, then the checks that catch a mistake while it is still cheap to fix. The last sections cover what goes wrong in year two and which jobs belong to a licensed trade.
By the second week of July a garden like this is doing exactly what it was designed to do. The mulch still holds its color. The drip comes on at six, and the only person outside is the one reading a pressure gauge before the neighbors’ sprinklers start.
Set the Upkeep Budget Before the Layout
An upkeep budget is the number of hours you will actually spend in July, and every design decision either fits inside it or breaks it. Most of that time goes to edges, bare soil, and water delivery rather than to plants.
Fix the number first. A retired homeowner with three free mornings a week and a household with two working adults and a small child are designing two different gardens, even when they like the same plants.
Good garden design answers to that budget. Bed count, bed size, and the way water arrives are the three dials, and the table below turns each one into hours.
| Design decision | Work it creates | What it asks of you |
|---|---|---|
| Lawn kept in the plan | Mowing, edging, feeding, water in dry spells | A session most weeks from spring through fall |
| Beds of shrubs, perennials, and ground cover under mulch | Topping up mulch, cutting back perennials, light weeding | Two afternoons a year |
| Annual bedding | Replanting twice, deadheading, watering | An afternoon every month in season |
| Containers and hanging baskets | Watering, feeding, replacing tired soil | A daily job in a heat wave |
| Drip on a controller, one valve per water-need group | Flushing, filter cleaning, run-time changes as the season shifts | About an hour a season |
| Weed-barrier fabric under organic mulch | Pulling weeds whose roots have knitted into the cloth | Climbs from year two; it does not fall |
Four Measurements That Decide the Plan
Four site readings settle more of the design than any plant choice: how fast the soil drains, how many hours of sun each area gets, what the water pressure does while taps are open, and how much the ground rises across the bed.
Drainage
Dig a hole about a foot deep and a foot wide, fill it with water, and watch how long it takes to disappear. Water still standing hours later means the root zone will stay saturated after every rain and every cycle. That single result rebuilds the plan downstream: raised beds, more compost worked in, shorter and less frequent runs, or plants that tolerate wet feet.
Test two or three spots. A yard that drains well at the front and holds water at the back is one site with two different designs in it, and a single hole hides that.
Sun hours
Record sun at three moments on a clear day, mid-morning, noon, and late afternoon, then repeat in the opposite season. A bed that reads six hours in June may read two in December, once a neighbor’s tree is either leafed out or bare. A shrub sold as full sun can coast on stored energy for one season before it thins out, which is why summer photographs mislead.
Water pressure
Screw a gauge onto the hose bib and read it twice: once with nothing running, once with two other taps open. Drip zones run best between roughly 20 and 30 psi, and a regulator can only bring pressure down, never up.
This is where the time of day matters. A static reading of 55 psi tells you almost nothing if flowing pressure drops to 22 while the kitchen tap and an outdoor shower are both on. A zone starved at the far end shows dry plants while the controller keeps logging a normal run time.
Rise and fall
Pressure shifts about 0.43 psi for every vertical foot between the valve and the end of a line. That is why University of California Agriculture and Natural Resources recommends pressure-compensating emitters wherever a zone climbs or drops more than a few feet. Without them, a downhill run drowns the low plants and leaves the top of the bed dry.
Materials That Cut Work Later
A low maintenance garden design leans on three material decisions more than it leans on the plant list: mulch depth, the drip components, and a controller that answers to the weather instead of a clock.
Wood chips spread four to six inches deep do the weed suppression that fabric is sold to do, and they break down into the soil instead of sealing it off. Linda Chalker-Scott, an extension horticulturist at Washington State University, sets out the case against fabric: in a permanent planting, organic matter and dust collect on top of the cloth, wind-blown seed germinates in that layer, and bindweed roots knit into the fabric until the weed is harder to remove than it would have been in open soil. North Dakota State and Penn State extension offices describe the same pattern, including geotextiles going brittle in sunlight inside a year.
Does the fabric work at all? On a path, or under gravel, yes. Under bark chips in a planted bed, no.
A garden drip irrigation system design is assembled in a fixed order: backflow device at the connection, filter, pressure regulator, supply tubing, emitters. A 150-mesh screen is the usual filter for drip, and it belongs somewhere you can reach, because it clogs before anything else does. University of Arkansas Extension flags one ordering detail that trips people up: an inexpensive filter with no pressure rating goes after the regulator, not before it.
Emitters run from about 0.5 to 2 gallons an hour, with pressure-compensating models holding their rated flow across a slope. Texas A&M AgriLife suggests at least two emitters per plant instead of one larger one, spaced around 18 inches apart, so a single clog does not cost the plant its water.
Weather-based and soil-moisture controllers cut the watering the ground never needed. The EPA’s WaterSense program estimates that replacing a clock timer with a WaterSense labelled weather-based controller saves an average home nearly 7,600 gallons a year, and more than 15,000 with a soil moisture-based unit. Those are averages for homes with in-ground systems, and a yard that was already watered sensibly has less to save.
The Install Sequence, in Order
Sequence matters more than speed, because each step removes work from a later one. This order is what turns a low maintenance garden design into a two-afternoon install instead of a summer of adjustments, and the first two steps decide whether the watering stays as simple as it needs to be.
- Cut the bed edge first. A clean spade line, or steel edging set flush with the soil, keeps lawn roots out of the planting area for years. A bed with no edge gets re-cut every season.
- Fix the soil across the whole bed, not just in the planting holes. Work a couple of inches of compost into the top few inches. Amending only the holes gives roots a reason to circle instead of spread.
- Group plants by water need and sun, then give each group its own valve. A zone that mixes lawn with lavender and hydrangeas can be programmed for one of them only, and the other two either drown or scorch.
- Run the water path in order: backflow device, filter, regulator, half-inch lateral, emitters. University of California ANR puts the practical limit for half-inch lateral at roughly 200 feet, so keep every zone well under it.
- Flush before capping. Run each line clear of construction grit before the end caps and emitters go on, then open the ends once a season and flush again.
- Plant at mature spacing. Read the mature width on the label and plant for that number. Two shrubs that touch in year three are fine; two that collide in year five mean annual pruning.
- Mulch four to six inches, pulled back from stems. Keep chips off the tubing you need to see and off the crowns of perennials.
- Set the controller, then write the schedule down. Zone, emitter count, run time, and the month it was set. That note turns the seasonal adjustment into a two-minute job.
What to Check After the First Run
Run every zone end to end once and walk the line while it is wet. Most installation mistakes surface in that first cycle, and all of them are cheaper to fix before the mulch goes down.
Then check the three things a timer cannot tell you.
Wetting depth. Push a probe or a trowel down after a run and see how far the moisture reached. Damp at the surface and dry at six inches means the run is too short, and short daily runs build shallow roots that need more water, not less.
Uniformity. Look for dry bands between plant groups and for emitters that have popped off. A dry band is usually spacing, not pressure.
Run time against what the plants need. The arithmetic is one division. Thirty inline emitters rated at 1 gallon an hour deliver 30 gallons an hour; 20 minutes puts down 10 gallons, and spread over a 10-by-3-foot bed that is close to half an inch of water. Two runs like that cover the one inch a week that university extension guidance gives for established plantings, rain included.
Write those numbers into the note. The same zone wants a shorter run in April than it needs in July, and the difference is easy to miss when the controller has not been touched since spring.
The Work That Repeats Each Season
A garden built around an hour budget still needs the small recurring jobs done on time, because each one prevents a larger repair later. Garden irrigation maintenance is front-loaded: ten minutes with a filter in spring buys a season without a clogged zone.
| Season | What gets done | Time it takes |
|---|---|---|
| Early spring | Walk each zone while it runs and flush the lines; clean the filter; set the controller for the growing season; top up mulch where it thinned | An hour or two |
| Summer | Check wetting depth every week or two in the first year; watch for dry bands; refill mulch | Ten minutes a week |
| Early fall | Cut back what needs it; clean the filter again; set run times shorter as the days shorten | Half an hour |
| Late fall | Drain or blow out lines where the ground freezes; close the zone valves; leave the beds alone | An hour, once |
Winter moves the same low-effort logic indoors, and the choices in best low maintenance indoor plants for beginners your winter light can support get made the same way: fewer species, bigger pots, one watering day.
Where These Designs Fail by Year Two
Six failures account for almost every low maintenance garden design that turns back into a chore, and five of them are installation decisions rather than plant problems.
The filter never gets cleaned. Emitters clog from the far end first, so the symptom is a zone that looks fine at the valve and dry at the last plant. When one plant dries out while its neighbors stay wet, check that emitter before you lengthen the run.
A zone serves two water needs. Lavender and hydrangeas under one valve means one of them is always wrong, and the fix is a second valve, not a compromise run time that leaves both half-watered.
Fabric went under organic mulch. By year three the chip layer has rotted into a second soil sitting on top of the cloth, and weed seed germinates in it. Roots that have grown through the fabric tear rather than pull, so the bed becomes harder to work than it was before the fabric was laid.
The controller still runs the April schedule in July. Run times set in spring come up short in midsummer, and the plants answer with slow growth and scorched leaf edges that look like disease.
Plants went in at nursery spacing. A gallon pot looks sparse at planting and full at year two, right up to the point where it is three feet wider than the label promised. Crowded beds need cutting back, and cutting back is the work the design was supposed to remove.
Nothing holds the edge. Lawn grass and ground cover both move into open soil, and a bed without an edging line loses a few inches a year. Re-cutting an edge twice a season is the maintenance nobody counted in the budget.
Where DIY Stops
Four jobs sit outside what a homeowner should take on, and every one of them is blocked by a rule or an electrical risk rather than by skill.
Connecting to the drinking-water supply. Irrigation tied to the potable main is a cross-connection, because pipe sitting in soil can carry fertilizer, animal waste, and bacteria back into the household supply if pressure drops. Water utilities commonly require an approved backflow assembly, and many require a permit for the connection itself.
Texas requires a licensed irrigator or irrigation technician to make that tie-in, with the assembly retested by a certified tester, often annually. A system that injects fertilizer or chemicals needs a reduced-pressure assembly or an air gap, and no cheaper device is approved for that use.
Anything electrical beyond a plug. Outdoor receptacles at a home need GFCI protection under the National Electrical Code, and the 2020 edition widened that from receptacles to all outdoor outlets on a dwelling, which reaches a hard-wired controller. States amend the code differently, so a new outdoor circuit belongs to a licensed electrician.
Retaining walls past the height threshold. The model residential code exempts walls up to four feet from a permit, unless the wall carries a surcharge such as sloped fill, a driveway, or a building footing. Height is measured from the bottom of the footing to the top of the wall, not from the soil you can see, so a wall that looks like three and a half feet above grade can already be over the line. Some jurisdictions read it more strictly still and count only two or three feet of exposed face. Ask the local building department for the number that applies before anything gets excavated.
Tree work off the ground. Anything above head height with a saw, and root work near a mature tree, belongs to a certified arborist. Removal and heavy pruning also carry permit rules in many cities.
Everything else stays well inside a homeowner’s range: layout, bed construction, drip on the spigot side, mulch, planting, and the seasonal checks that keep the zone list honest.
Sticking Points in Low Maintenance Garden Design
These are the points that come up most often once the plan is in front of someone, answered in short form.
What counts as a low maintenance garden?
Low maintenance garden design describes a workload, not a plant palette: beds that take two afternoons a year plus about an hour a season on the watering system. If the recurring jobs fit that budget, the garden qualifies.
How much time should it take each week?
Once the beds are mulched and the drip runs on a controller, summer drops to about ten minutes a week: a walk past the zones, a moisture check, and a look at the mulch line. Spring and fall carry the bigger jobs.
Does drip irrigation make a garden low maintenance?
Drip removes the daily decision of what to water, and a garden drip irrigation design that puts each water-need group on its own valve removes the mistakes that come with that decision. It adds a filter to clean and lines to flush, so the trade is daily hand-watering for roughly an hour a season.
What are low maintenance garden bed ideas?
Start with the bed shape in any low maintenance garden design: wide, gently curved beds mow and edge faster than narrow, fussy ones, and three to four feet of width can be reached from either side. Fill them at mature spacing, mulch four to six inches, and water the zone instead of carrying a hose.
Can a garden be low maintenance for an older homeowner?
Yes, and the changes are structural rather than botanical: fewer and larger beds, raised beds for anything that needs regular access, paths wide enough for a wheelbarrow or a walker, and no containers that demand daily water. Moving the work to waist height does more than any choice of plant.
The measurements take an afternoon, a hose, and a trowel. If the drainage test comes back with water still standing the next morning, that result rebuilds the plan: raised beds, shorter runs, and planting choices inside a low maintenance garden design that keeps roots out of saturated soil. The rest of the work fits into the weekends after that.
