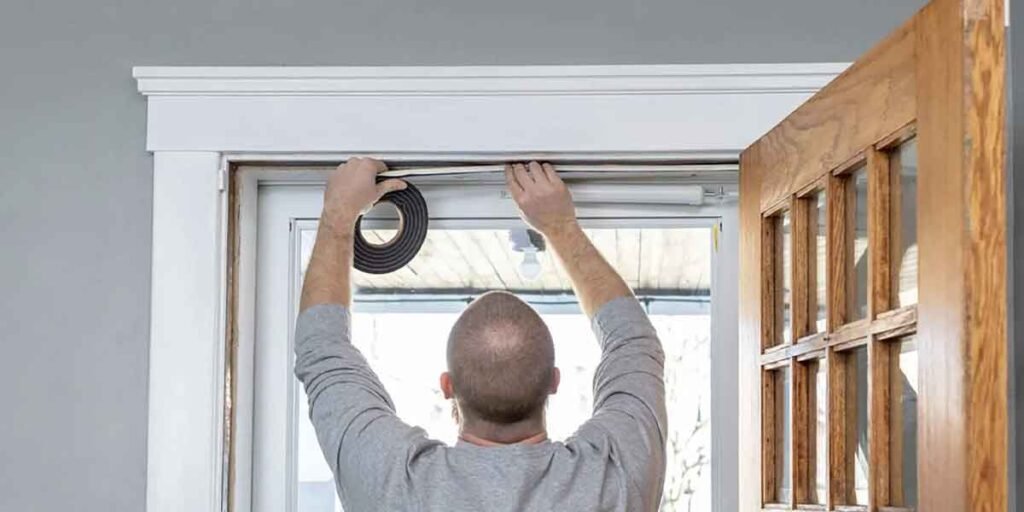
Most entry doors leak or stick because a single part failed.
The cold that runs across your ankles, the dark line on the threshold after rain, and the shove it takes to close the door in a wet week are three separate repairs wearing one complaint. Ten minutes of testing separates them, and the result decides whether the fix is a screwdriver and a strip of vinyl or a call to somebody with a truck.
Testing first also protects the repair itself. A fresh jamb seal fitted while the sill is still set high gets pressed flat within a season, and the owner blames the strip instead of the sill.
Prep Before the First Test
Test a closed, latched door in still air, with the furnace or air conditioner off and the kitchen and bath fans quiet. Moving air changes what a slip of paper does at the door edge, which is why the same door passes one morning and fails the next.
Gather a strip of paper about the width of a dollar bill, a sheet of tissue, a number 2 screwdriver, a putty knife, a tape measure, and a flashlight. Add gloves and safety glasses if the slab has to come off its hinges, and plan on two people for that lift. A solid wood or steel door is heavier than it looks, and a glazed door is heavier still.
A cold morning is the free instrument for the draft test. The first steady rain is the free instrument for the water test. Neither can be reproduced indoors.
Three Tests to Run When Entry Doors Leak or Stick
When entry doors leak or stick, the fault sits in one of three places: the compression seals along the head and jambs, the sweep and threshold at the bottom, or the frame and sill underneath. Each test below convicts one of the three.
The paper slip. Latch the door and work a strip of paper between the door face and the frame, beginning at a top corner and moving down each side. Where the paper drags, the seal is still doing its work. Where it slides free, that length of weatherstrip has stopped compressing, and the run of failures tells you how much to buy. Watch for the door that grips on the hinge side and releases on the lock side; that pattern is a strike-plate or hinge problem, and new weatherstrip will not touch it.
The bottom edge. Hold a sheet of tissue against the gap under the door in a quiet room. A tissue that lifts and drops with each heating or cooling cycle is reading a sweep that no longer touches the threshold. On a cold day, run the back of your hand along the inside of the threshold. A band of cold across the full width points at the sweep or the sill cap; a cold spot at one corner points at a break in the frame.
The water path. After rain, look at the sill from outside and again from inside. Standing water on the sill cap, a dark stain on the threshold, or a soft patch of finish at the lower frame corner all point at drainage. Weatherstripping does not control drainage.
Press a thumbnail into the wood at the lower corners of the frame and along the sill cap. Paint that gives way, or wood that crumbles instead of denting, means water has been working there for more than one season and the repair has already changed size.
Condensation is the fourth pattern and it comes from the air, not the weather. Fog on the room side of the glass is humid indoor air meeting a cold pane, and it clears with ventilation. Fog trapped between the panes means the sealed glass unit has lost its seal, and no strip of foam, vinyl, or magnetic material reaches that.
Replace the Seal in the Right Order
Work from the ground up: sill and threshold, then the sweep, then the jamb strips, then the lock and hinges. Every step changes the gap the next part has to fill, so skipping ahead means buying the same part twice.
Threshold and sill cap. Clean grit and old caulk off the sill cap, confirm it still slopes water toward the outside, and adjust or replace the cap if it sits flat or holds water. A cap set tight against the door lifts the sweep off the floor on one side and loads the hinges on the other, which is how a door ends up dragging and leaking at the same time.
Sweep. Replace a sweep that has flattened, torn, or hardened at the ends. Hold the new one against the closed door before cutting it to length, and leave it resting on the threshold with light contact. A sweep pressed hard into the sill drags through a humid summer and wears through at the hinge corner first.
Jamb weatherstrip. Match the type to the door: a vinyl V-strip where the reveal is tight, a foam or bulb strip where the gap is wider, and a magnetic strip only on a door that was built around one. Push the old strip out of its kerf with a putty knife before fitting the new length. Do not attempt to rebuild a spent strip with caulk or silicone; the seal has to compress and release thousands of times a year, and a bead of sealant cannot. The entry doors maintenance tips that keep a strip alive are mostly about cleaning it gently and leaving it alone, and the step that actually restores a failed seal is replacement.
Lock, strike plate, and hinges. With the seals in place, test the latch: it should turn without a shove, and the strike plate should not show a polished track where the bolt has been riding on it. Move the plate a fraction rather than filing it. Tighten hinge screws, and where a screw spins in a stripped hole, drive a longer one so it reaches the stud behind the jamb. Dry or graphite lubricant on the hinges and lock cylinder survives cold better than oil, which thickens and collects grit.
Then run the paper test again. A door that holds paper along both sides and the head, and that shows a compressed line on the strip when you open it, has a working seal. That is the checkpoint for the whole section. Anything less means the next part in the order needs attention, not more torque on the screws.
I once replaced every length of weatherstrip on a front door before touching the threshold. The new strip sealed the head and the lock side, and the bottom failed in exactly the same place the old one had, because the sill had been deciding that gap the entire time.
When the Door Body or the Frame Is the Problem
A seal cannot fix a door that has moved, and doors move more than owners expect. Wood takes on moisture in humid months and releases it in dry ones, so a slab that drags in July and swings free in January is reporting on the air in your home, not on the hardware.
Look at the reveal above the door: an even gap that widens at one top corner and closes at the other says the frame is out of square or the slab has warped. Doors that have taken on water along one stile do the same thing, and planing the edge only buys a season before the door needs a replacement.
The sill is where water does its real work. Where a manufacturer’s flashing details are not provided, the International Residential Code requires pan flashing at the sill of exterior door openings, sealed or sloped so that water drains to the exterior wall finish or to the water-resistive barrier, with protection at the head and sides as well. The provision sat in section R703.8 and moved to R703.4.1.1 after the 2015 edition, and replacement doors fall under it. A door dropped onto a bare, flat sill can pass every paper, tissue, and water test and still rot the floor below it, because the seal keeps weather out and the flashing handles the water that gets past the weather.
Fogged glass is its own category. A failed sealed unit cannot be refilled, so the fix is a new lite set into the door by a glass shop, or a new door where the lite is not replaceable.
Two Clocks for Entry Doors
The maintenance rhythm depends on who walks through the opening. A house carries no inspection requirement on its front door. An assembly, educational, or institutional building carries several.
NFPA 101 requires door assemblies equipped with panic or fire exit hardware, doors in exit enclosures, electrically controlled egress doors, and doors with special locking arrangements to be inspected and tested at least annually, and occupancy chapters covering assembly, educational, day care, and residential board and care occupancies drive most of that work. NFPA 80 requires fire door assemblies to be inspected and tested annually, with a written record signed and kept for the authority having jurisdiction. The hardware has numbers attached: panic hardware must release under a force no greater than 15 pounds-force (about 66 newtons), and on new installations the actuating bar sits between 34 and 48 inches above the floor.
That is the practical divide between commercial entry doors and the one on a house. A commercial door is maintained against a documented standard because its failure is a life-safety event, and the log is part of the building’s compliance file. The front entry doors of a home are maintained for comfort, for water damage, and for the heating bill. Both fail in the same two places, at the seals and at the sill.
Where Homeowner Work Stops
Replacing a sweep, adjusting a sill cap, swapping jamb weatherstrip, lubricating hinges, and nudging a strike plate are homeowner work on any door you can lift with help.
Stop at the point where the repair stops being about a part. Any one of these puts the work past what a strip of vinyl can reach:
- Wood at the sill cap or the lower jamb gives under a thumbnail, or crumbles instead of denting.
- The floor inside the threshold is stained, soft, or springy underfoot.
- The frame is out of square, or the reveal is uneven enough that the door cannot hang true.
- The slab has warped and will not seal at any hinge or strike-plate setting.
- Fog sits between the panes of the glass.
- The repair requires pulling the jamb, which means re-flashing the opening.
Wiring belongs to a licensed electrician as well. Electric strikes, keypad and access-control hardware, and door-position sensors can leave a door unusable in an emergency when a connection fails, and that risk sits outside the reach of a screwdriver and a tube of sealant.
If the work touches framing or an exterior wall, ask the local building department whether it needs a permit before ordering materials. The answer varies by jurisdiction, and a door replaced without one is a problem at resale rather than at the door.
Questions About Entry Doors That Leak or Stick
Why do entry doors leak or stick in winter?
Cold outdoor air holds less moisture, and a wood slab gives up moisture with it, so the slab shrinks and the gaps at the jambs widen just as the temperature difference across the door grows. A door that sticks through a humid summer and leaks in a dry winter is reporting on moisture in the wood, not on the seals.
How do I test a door seal without buying anything?
Use a strip of paper. Close and latch the door, then slide the paper along the head and both jambs; it should drag wherever the seal is working and slide free wherever it has failed. For the bottom, hold a tissue against the gap under the door and watch it move.
Can I replace a door sweep myself?
Yes, when the sill cap is sound and the new sweep sits on the threshold with light contact. Sweeps fasten with screws or slide into a kerf, and either style takes under half an hour with a screwdriver and a utility knife. A sweep that touches hard drags and wears out in a season.
Does a draft mean the door needs replacing?
Rarely. A draft is usually a compressed or missing seal, a sweep that has flattened, or a sill cap set wrong, and all three are replacement-part repairs. Replacing the door makes sense when the slab has warped, the frame is out of square, or the wood at the sill has gone soft.
The One Test Worth Repeating
The paper test costs nothing, takes a minute, and catches a failing seal while the repair is still a strip of vinyl. Run it in autumn, before the first hard freeze finds the gap for you, and check the sill cap for softness while you are already down there.
