Setting up a home security camera system might seem like a complex task, but with careful planning and the right approach, it’s a manageable and highly rewarding project for any homeowner. This guide will walk you through the essential steps to install and configure your own surveillance system, ensuring your property is monitored effectively.
Why Invest in a Home Security Camera System?
Modern home security camera systems offer more than just deterrence; they provide crucial evidence in case of incidents, allow for remote monitoring of your property, and can integrate with other smart home devices. According to Watsonville rental services, from keeping an eye on packages to monitoring pets or checking in on loved ones, the benefits extend far beyond basic security.
Choosing the Right System for Your Needs
The market offers a variety of security camera systems, each with distinct advantages. Understanding your specific requirements is the first step in selecting the ideal setup for your home.
Wired vs. Wireless: A Comparison
| Feature | Wired Systems (e.g., PoE) | Wireless Systems (Wi-Fi, Battery) |
|---|---|---|
| Reliability | Highly reliable, less prone to interference | Can be affected by Wi-Fi signal strength and interference |
| Power | Often powered via Ethernet (PoE) or dedicated power lines | Battery-powered or plug-in; batteries require recharging |
| Installation | More complex, requires running cables | Easier, more flexible placement |
| Security | Less susceptible to hacking | More vulnerable to network-based attacks |
| Cost | Higher initial setup, lower long-term operating costs | Lower initial setup, potential for subscription fees |
Types of Cameras and Their Applications
Consider the environment and purpose for each camera. Dome cameras are discreet and vandal-resistant, ideal for indoor ceilings. Bullet cameras are more visible, often used outdoors due to their robust, weather-resistant design. PTZ (Pan-Tilt-Zoom) cameras offer dynamic coverage, allowing you to remotely adjust their view, while doorbell cameras provide a focused view of your entryway.
Storage Solutions: DVR, NVR, and Cloud
Digital Video Recorders (DVRs) are typically used with analog cameras, while Network Video Recorders (NVRs) are for IP cameras. Both store footage locally on a hard drive. Cloud storage offers off-site backup, protecting footage even if local equipment is compromised, though it often comes with a subscription fee.
Strategic Planning for Your Home Security Camera System
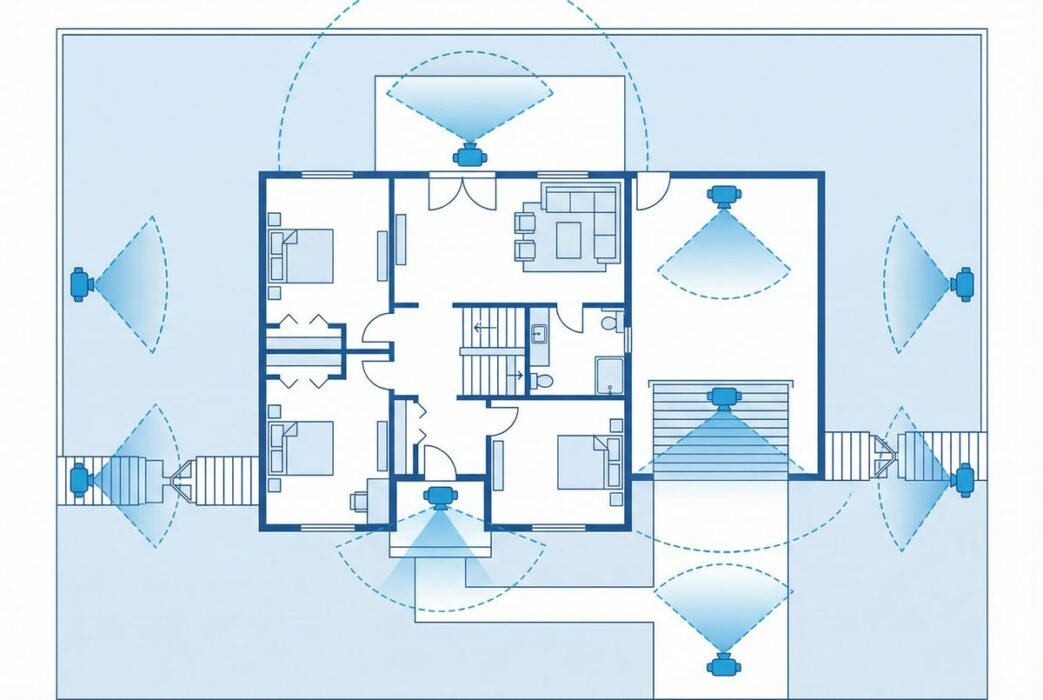
Effective placement is paramount for maximizing your system’s coverage and effectiveness. A well-thought-out plan can prevent blind spots and ensure critical areas are monitored.
Identifying Key Monitoring Areas
Focus on entry points like front and back doors, ground-floor windows, and garages. Consider areas with valuables or blind spots in your yard. A comprehensive plan covers all vulnerable access points and high-traffic zones.
Optimal Camera Placement and Angles
Mount cameras at a height of 8-10 feet to prevent tampering while still capturing clear facial features [3]. Aim cameras slightly downwards to cover a wider area and avoid direct sunlight, which can cause glare. Test different angles to ensure optimal field of view.
Power and Connectivity Considerations
For wired systems, plan cable routes carefully to conceal them and protect them from damage. For wireless cameras, ensure they are within range of your Wi-Fi network and have access to power outlets, or regularly check battery levels for wire-free models.
Step-by-Step Guide to Install Your Home Security Camera System
Once you’ve chosen your system and planned its layout, the installation process can begin. While specific steps may vary by system, the general procedure remains consistent.
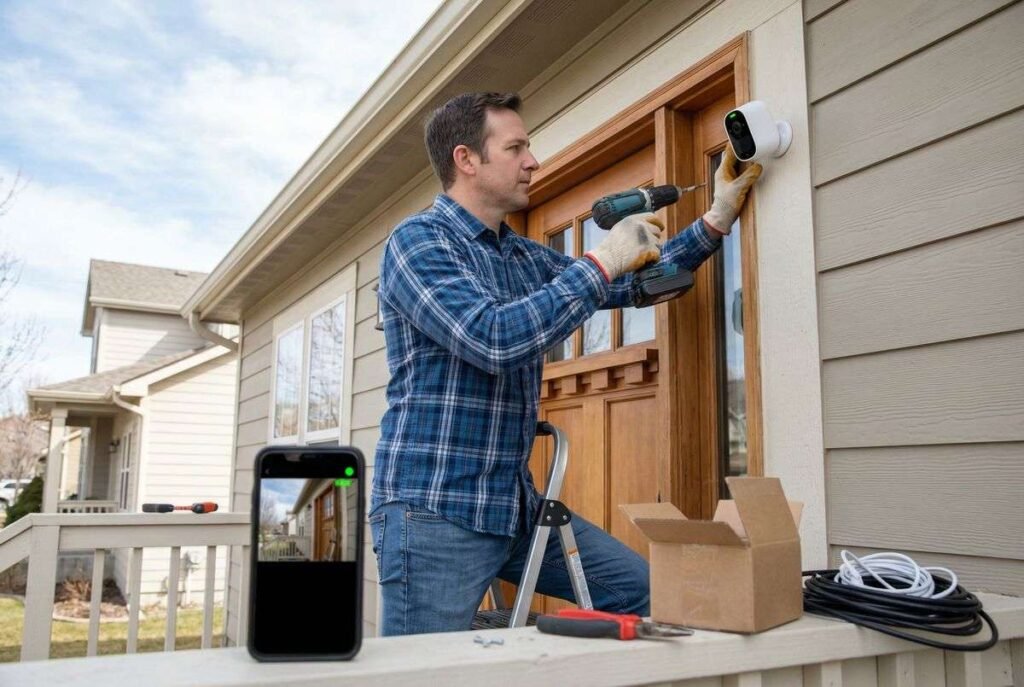
1. Mounting the Cameras
Use the provided mounting templates to mark drill holes. Securely attach the mounting brackets to walls or eaves, then affix the cameras. Ensure they are stable and positioned according to your plan.
2. Wiring and Powering Your System
For wired cameras, run Ethernet or power cables neatly along walls or through conduits to your NVR/DVR or power source. For wireless cameras, simply plug them into power outlets or ensure their batteries are charged.
3. Connecting to the Recorder and Network
Connect your NVR or DVR to your router using an Ethernet cable. Then, connect your cameras to the recorder. For wireless systems, connect cameras to your home Wi-Fi network following the manufacturer’s instructions.
4. Configuring the System Software
Install the accompanying software or mobile app. Follow the prompts to discover and add your cameras, set up recording schedules, motion detection zones, and notification preferences. Create strong, unique passwords for all devices.
Optimizing and Maintaining Your Security System
Installation is just the beginning. Regular optimization and maintenance will ensure your home security camera system operates reliably for years to come.
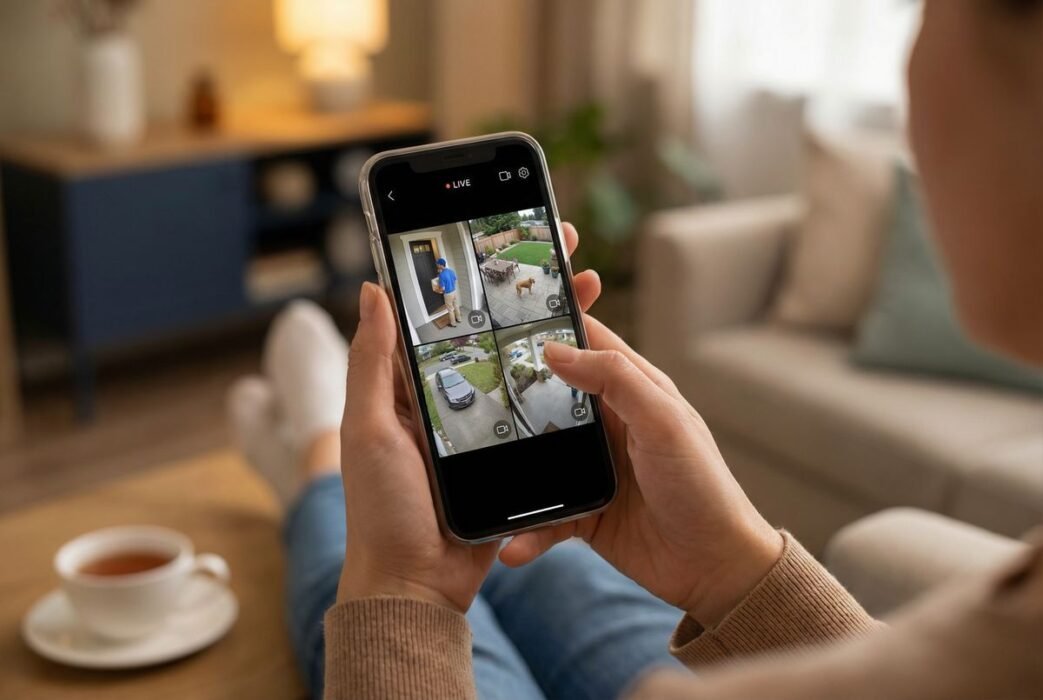
Setting Up Remote Viewing and Notifications
Most modern systems offer remote viewing via a smartphone app. Configure this feature to receive real-time alerts and view live or recorded footage from anywhere. Customize notification settings to avoid excessive alerts from minor movements.
Essential Troubleshooting Tips
If you encounter issues, start by checking power connections and network connectivity. Restarting devices often resolves minor glitches. Consult your system’s manual or online support for specific error codes or persistent problems.
Regular Maintenance for Longevity
Periodically clean camera lenses to ensure clear images. Check cable connections for wear and tear. For battery-powered cameras, monitor battery life. Regularly update firmware to benefit from new features and security patches.
Myth Busting: Common Misconceptions About Home Security Cameras
Many homeowners have misconceptions that can hinder their decision-making or lead to ineffective setups. Let’s clarify a few.
Myth 1: More cameras mean more security. While coverage is important, strategic placement of fewer, high-quality cameras can be more effective than numerous poorly positioned ones. Focus on quality and strategic angles over sheer quantity.
Myth 2: Wireless cameras are always easier to install. While they avoid extensive cabling, wireless cameras still require power and a strong, stable Wi-Fi signal. Signal interference or dead zones can significantly degrade performance, making wired options more reliable in some scenarios.
Myth 3: Once installed, no further attention is needed. Security systems, like any technology, require ongoing maintenance. Firmware updates, lens cleaning, and checking connections are vital for continuous, optimal operation. Neglecting these can lead to system vulnerabilities or degraded performance.
Conclusion
Setting up a home security camera system is a proactive step towards safeguarding your property and loved ones. By carefully planning, choosing the right equipment, and following a systematic installation process, you can create a robust surveillance solution tailored to your needs. Remember that ongoing maintenance and vigilance are key to ensuring your system provides continuous peace of mind.
Frequently Asked Questions
How high should I mount my security cameras?
It is generally recommended to mount security cameras at a height of 8 to 10 feet. This height makes it difficult for intruders to tamper with the camera while still providing a clear and wide field of view, capturing identifiable features.
Do I need professional installation for a home security camera system?
Many modern home security camera systems are designed for DIY installation, especially wireless models. However, for complex wired systems or if you are uncomfortable with electrical work and drilling, professional installation can ensure optimal placement and setup.
Can I view my security camera footage remotely?
Yes, most contemporary home security camera systems offer remote viewing capabilities through dedicated smartphone applications or web portals. This allows you to monitor your property in real-time and access recorded footage from anywhere with an internet connection.
What is the difference between DVR and NVR systems?
DVR (Digital Video Recorder) systems are typically used with analog cameras and process video at the recorder. NVR (Network Video Recorder) systems are used with IP cameras, which process video at the camera itself before sending it to the NVR for storage. NVRs generally offer higher resolution and more advanced features.
How often should I clean my security camera lenses?
The frequency of cleaning depends on the environment. For outdoor cameras, cleaning every 1-3 months is a good practice to remove dust, dirt, and cobwebs. Indoor cameras may require less frequent cleaning, perhaps every 6 months, to maintain clear image quality.
